How to use Glide with ChatGPT
This guide shows you how to connect your Glide system to ChatGPT. Once it's connected, you can ask ChatGPT questions about your clients, jobs and deadlines in plain English, and ask it to update things in Glide for you.
ChatGPT connects to Glide through Glide's MCP server. Follow the steps below to connect your Glide user account to your ChatGPT user account. This feature does not allow other ChatGPT users to access your Glide data, nor does it allow other users of your Glide system to access your ChatGPT account. It takes about five minutes, and you only need to do it once.
Using this feature will share relevant data from your Glide system with ChatGPT. For example, if you ask ChatGPT to summarise a client on your Glide system, the relevant data related to that client is sent to ChatGPT to allow it to respond to your question.
In this guide
- Before you start
- Add Glide to ChatGPT
- Connect your Glide account
- Using Glide in ChatGPT
- If something goes wrong
Before you start
You will need:
- A ChatGPT account, signed in at chatgpt.com.
- Access to your Glide account on the same web browser
- The Glide MCP server switched on for your practice (see below).
Switch on the MCP server in Glide
This only needs to be done once for the whole practice, and it must be done by a Glide super user. If you're not a super user, you will need to ask the relevant person to do this for you first.
In Glide, go to System Configuration and find the AI Assist section. Next to MCP Server, select Yes, then save.

Set MCP Server to Yes.
Add Glide to ChatGPT
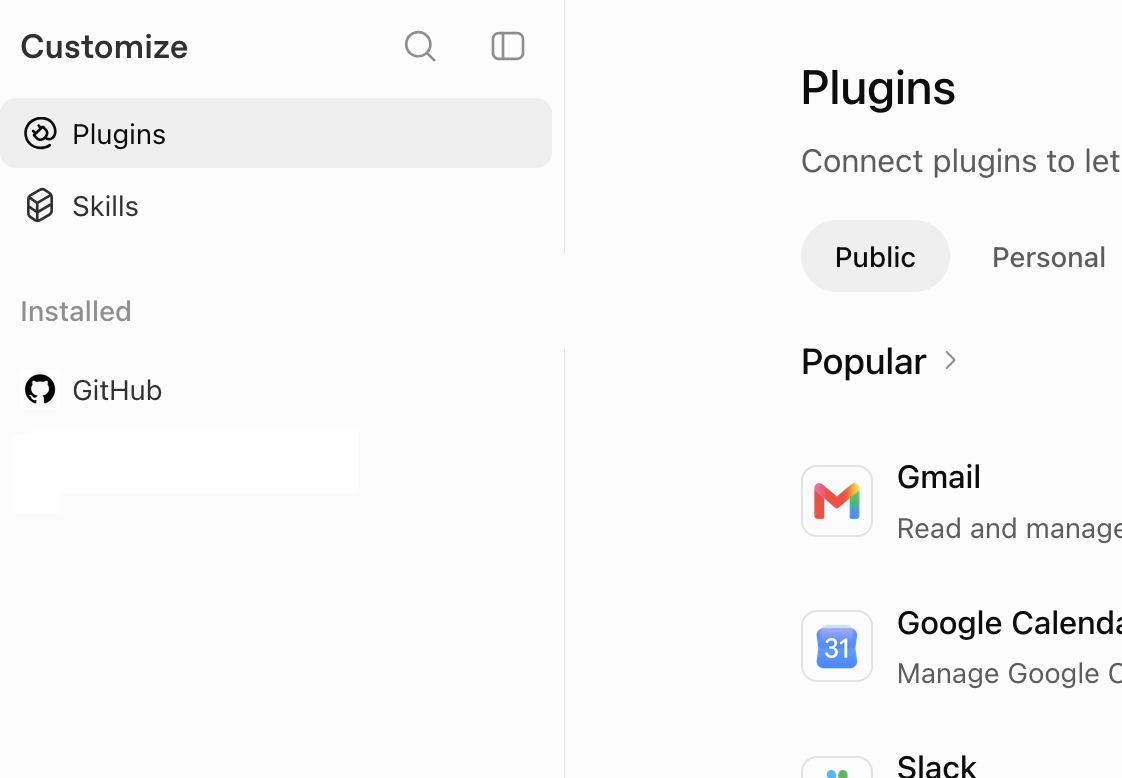
1. Open Plugins in ChatGPT
In ChatGPT, open Plugins from the left-hand menu. You can also go straight to chatgpt.com/plugins.
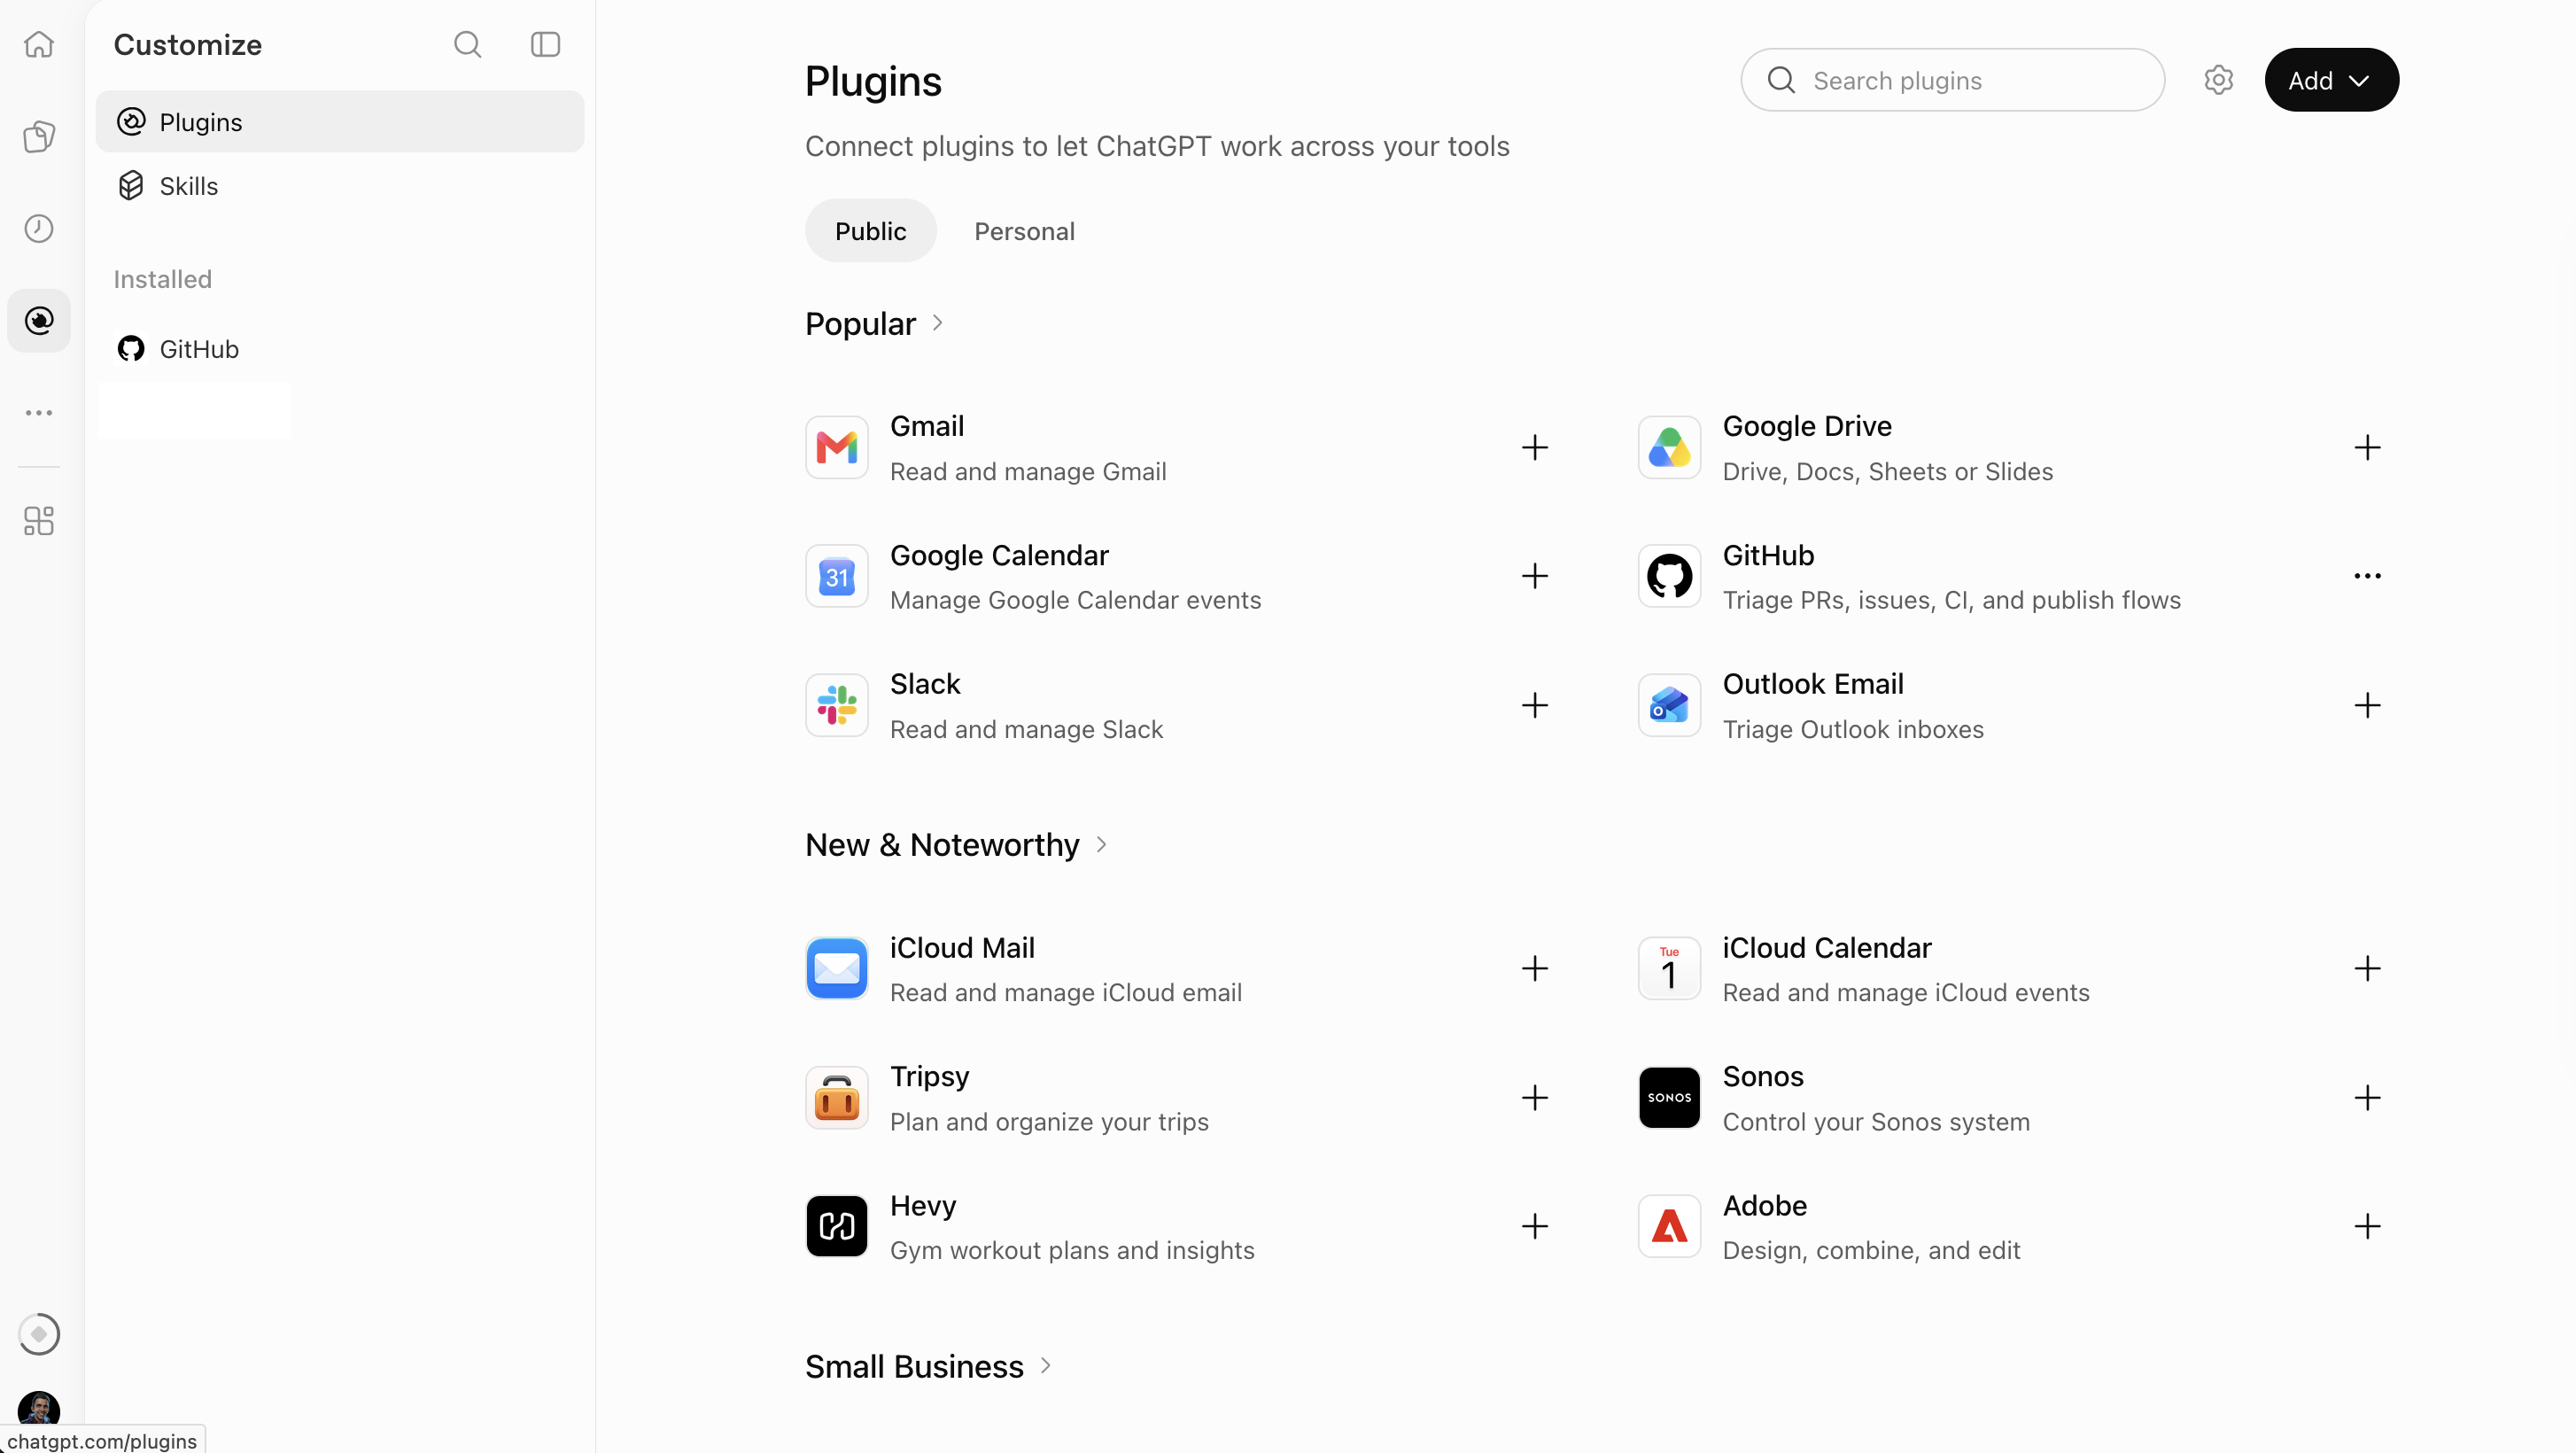
2. Find the Add button
The Plugins page opens and lists apps you can connect to ChatGPT. Glide isn't yet featured on this list, so you'll need to add it manually. Look for the black Add button in the top-right corner.
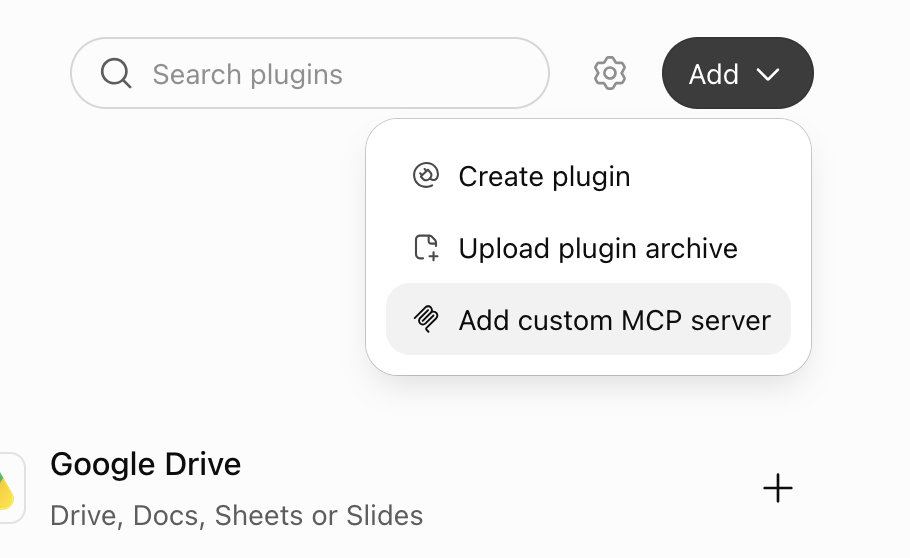
3. Choose “Add custom MCP server”
Click Add, then click Add custom MCP server.
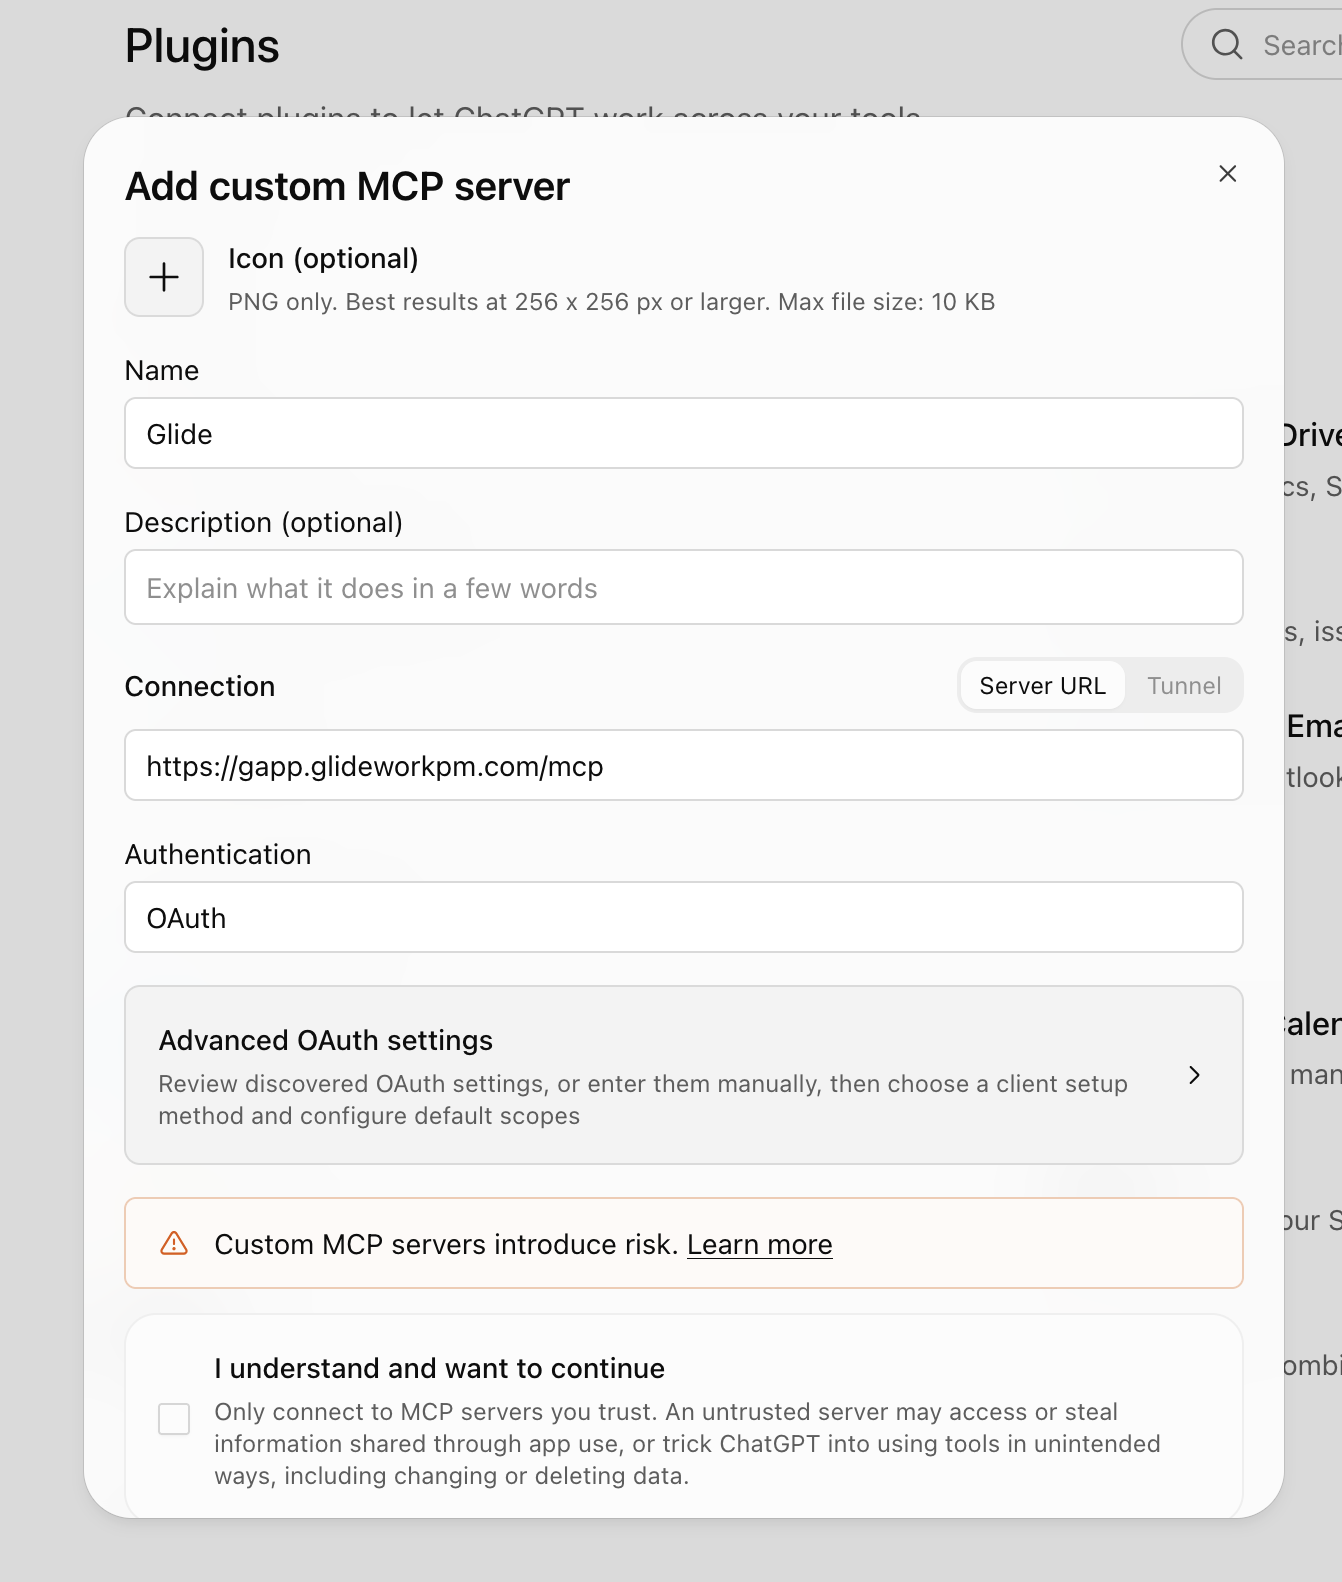
4. Fill in the details
A form will appear. Fill it in like this:
| Field | What to enter |
|---|---|
| Icon | Leave blank (optional) |
| Name | Glide |
| Description | Leave blank (optional) |
| Connection |
Make sure Server URL is selected, then enter the URL that you see on the MCP Server - AI Agents tab of your Glide profile page. For most users this will be the following URL:
|
| Authentication | OAuth |
5. Leave the Advanced OAuth settings as they are
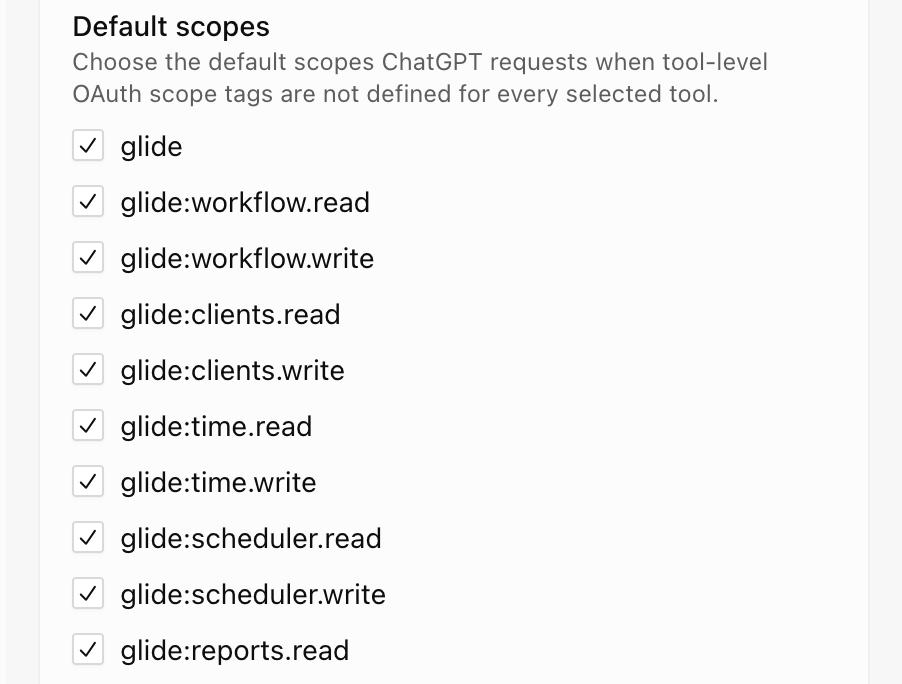
You don't need to change anything under Advanced OAuth settings. If you open it, you'll see a list of Glide permissions with every box ticked. Leave them all ticked for now as you can customise the availability of certain pieces of data at the next stage of the process.
6. Tick the box and create the plugin
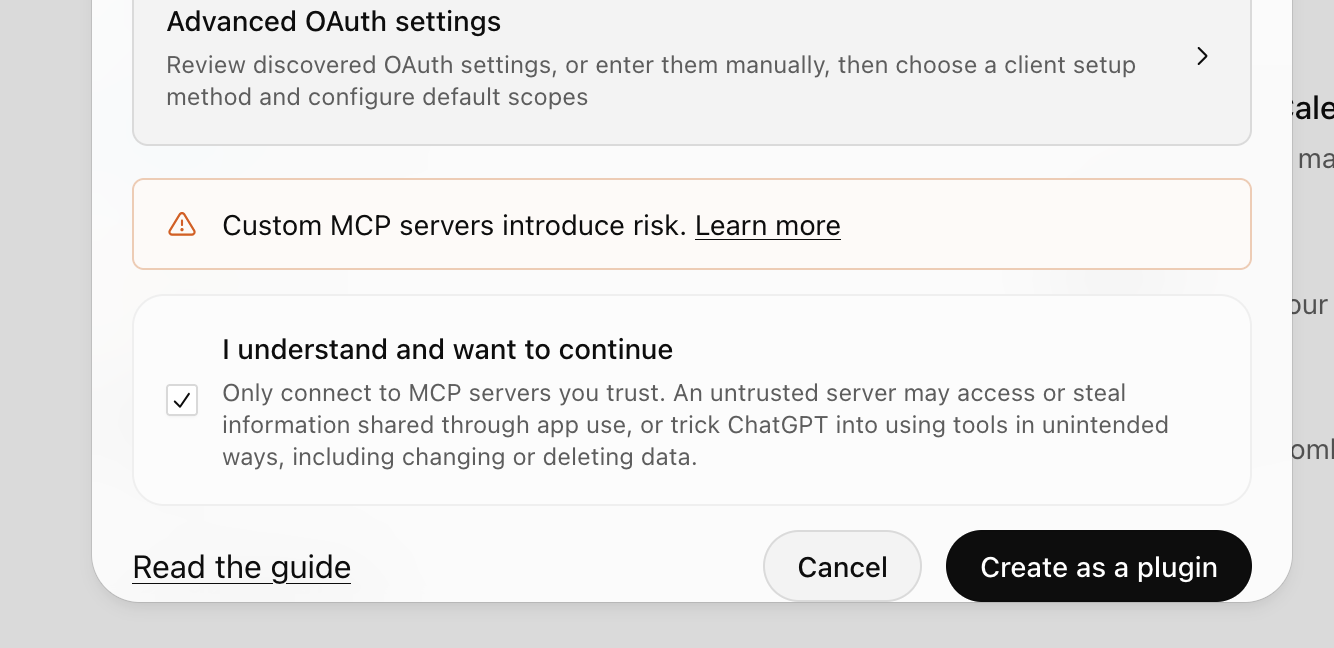
Scroll to the bottom of the form. Tick I understand and want to continue, then click Create as a plugin.
Connect your Glide account
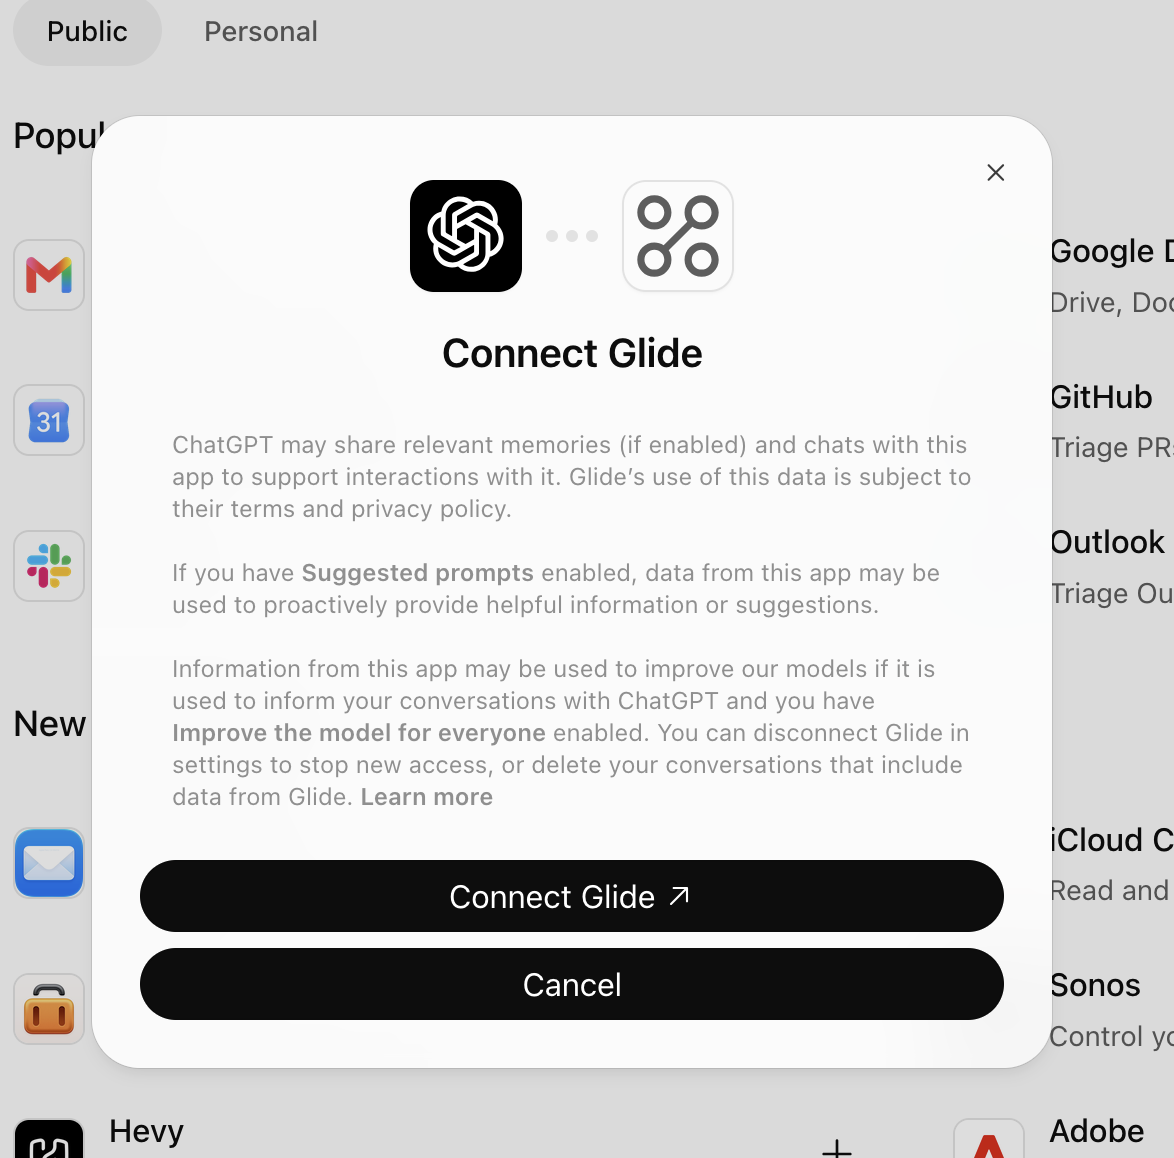
7. Click “Connect Glide”
ChatGPT will ask you to connect Glide. Click Connect Glide. A Glide page will open in your browser.
8. Check your account and choose what ChatGPT can use
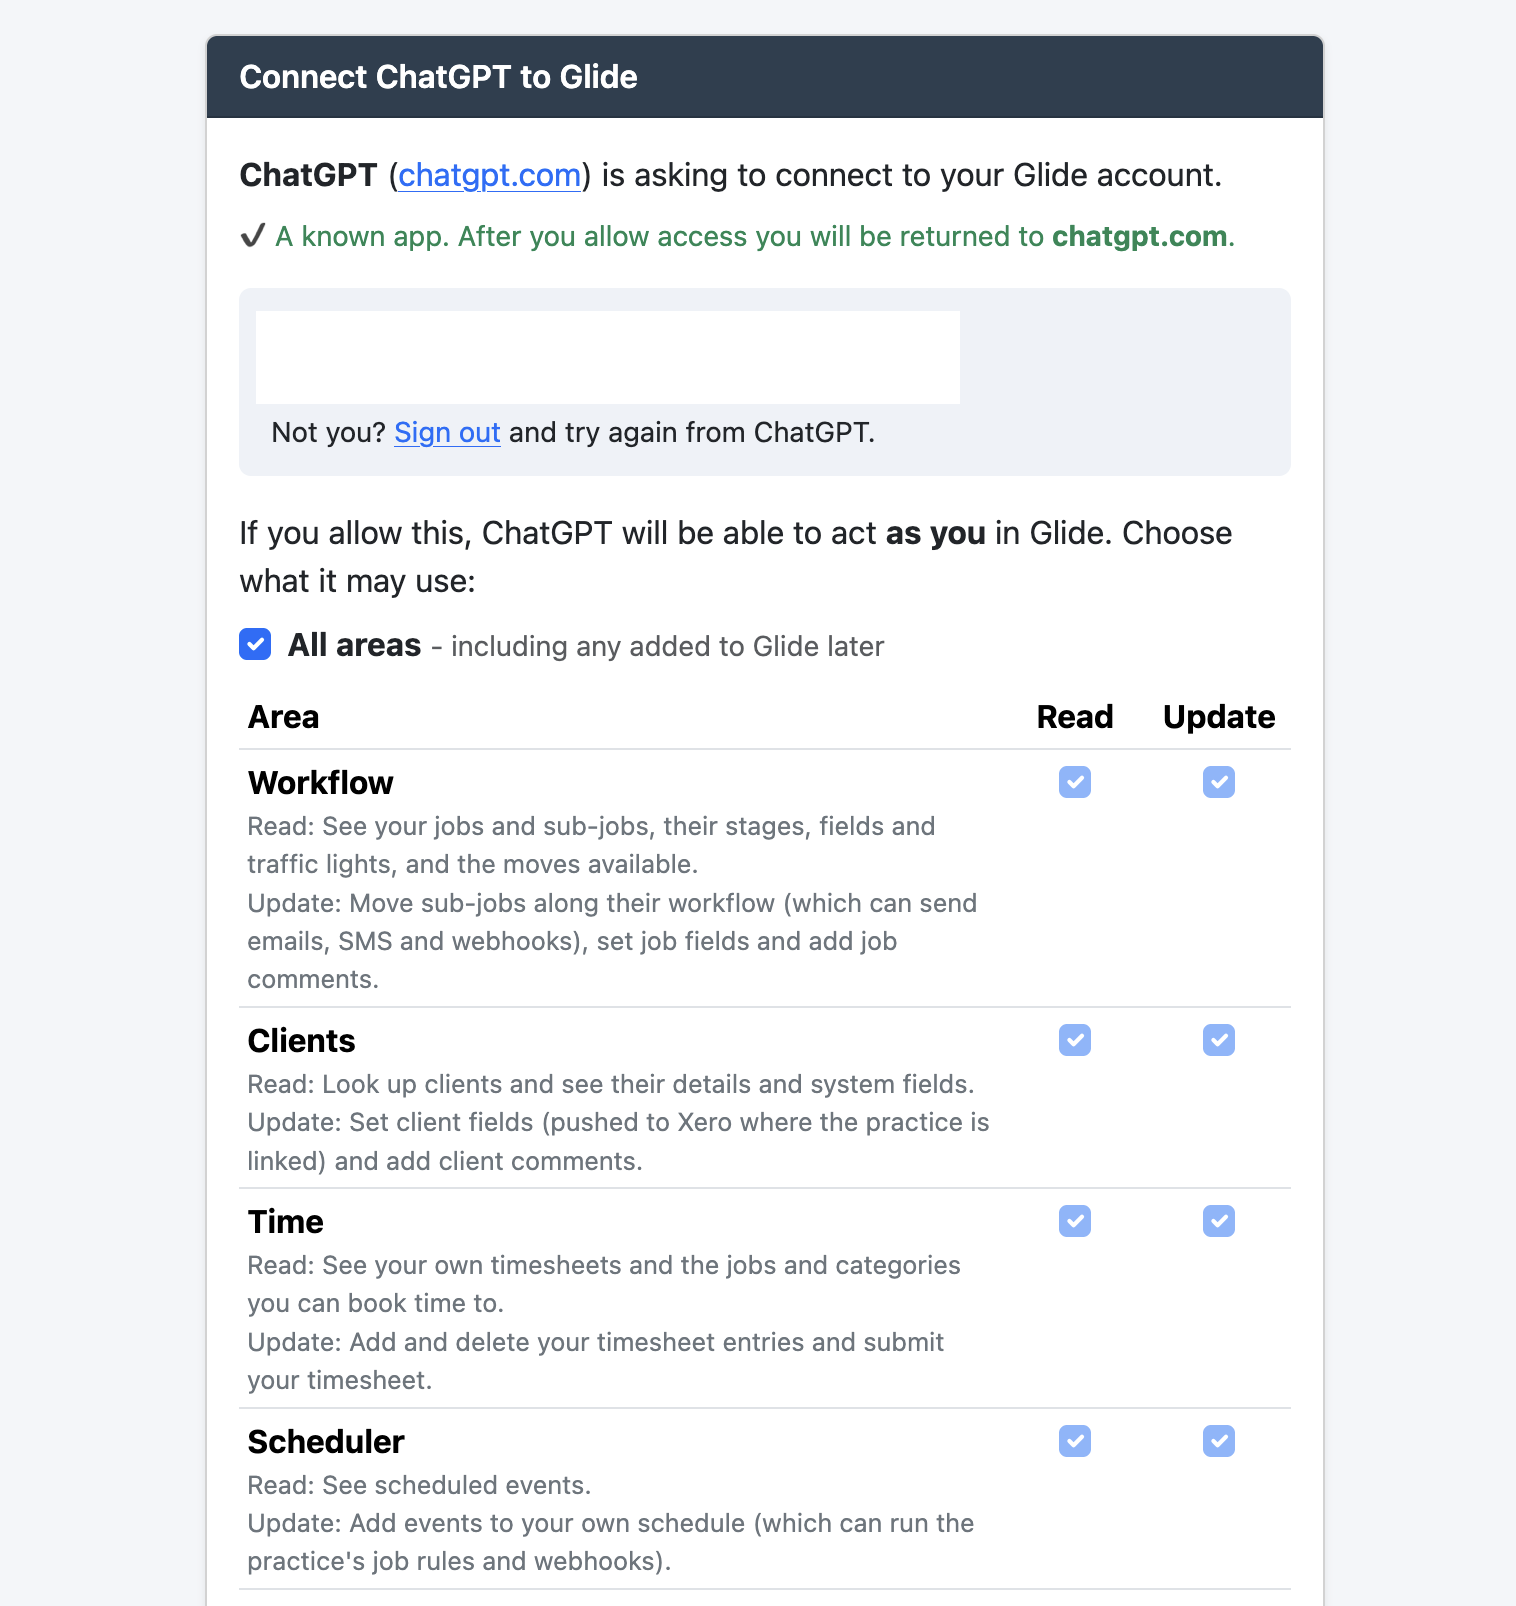
Glide shows the Connect ChatGPT to Glide page. If Glide asks you to log in, use your normal Glide username and password.
Next, choose which parts of Glide ChatGPT can use. All areas is ticked to start with. For each area you can allow:
- Read: ChatGPT can look at this information.
- Update: ChatGPT can make changes to it.
Untick anything you don't want ChatGPT to access.
9. Click “Allow access”
Scroll to the bottom of the page and click Allow access. You'll be taken back to ChatGPT, and Glide is now connected.
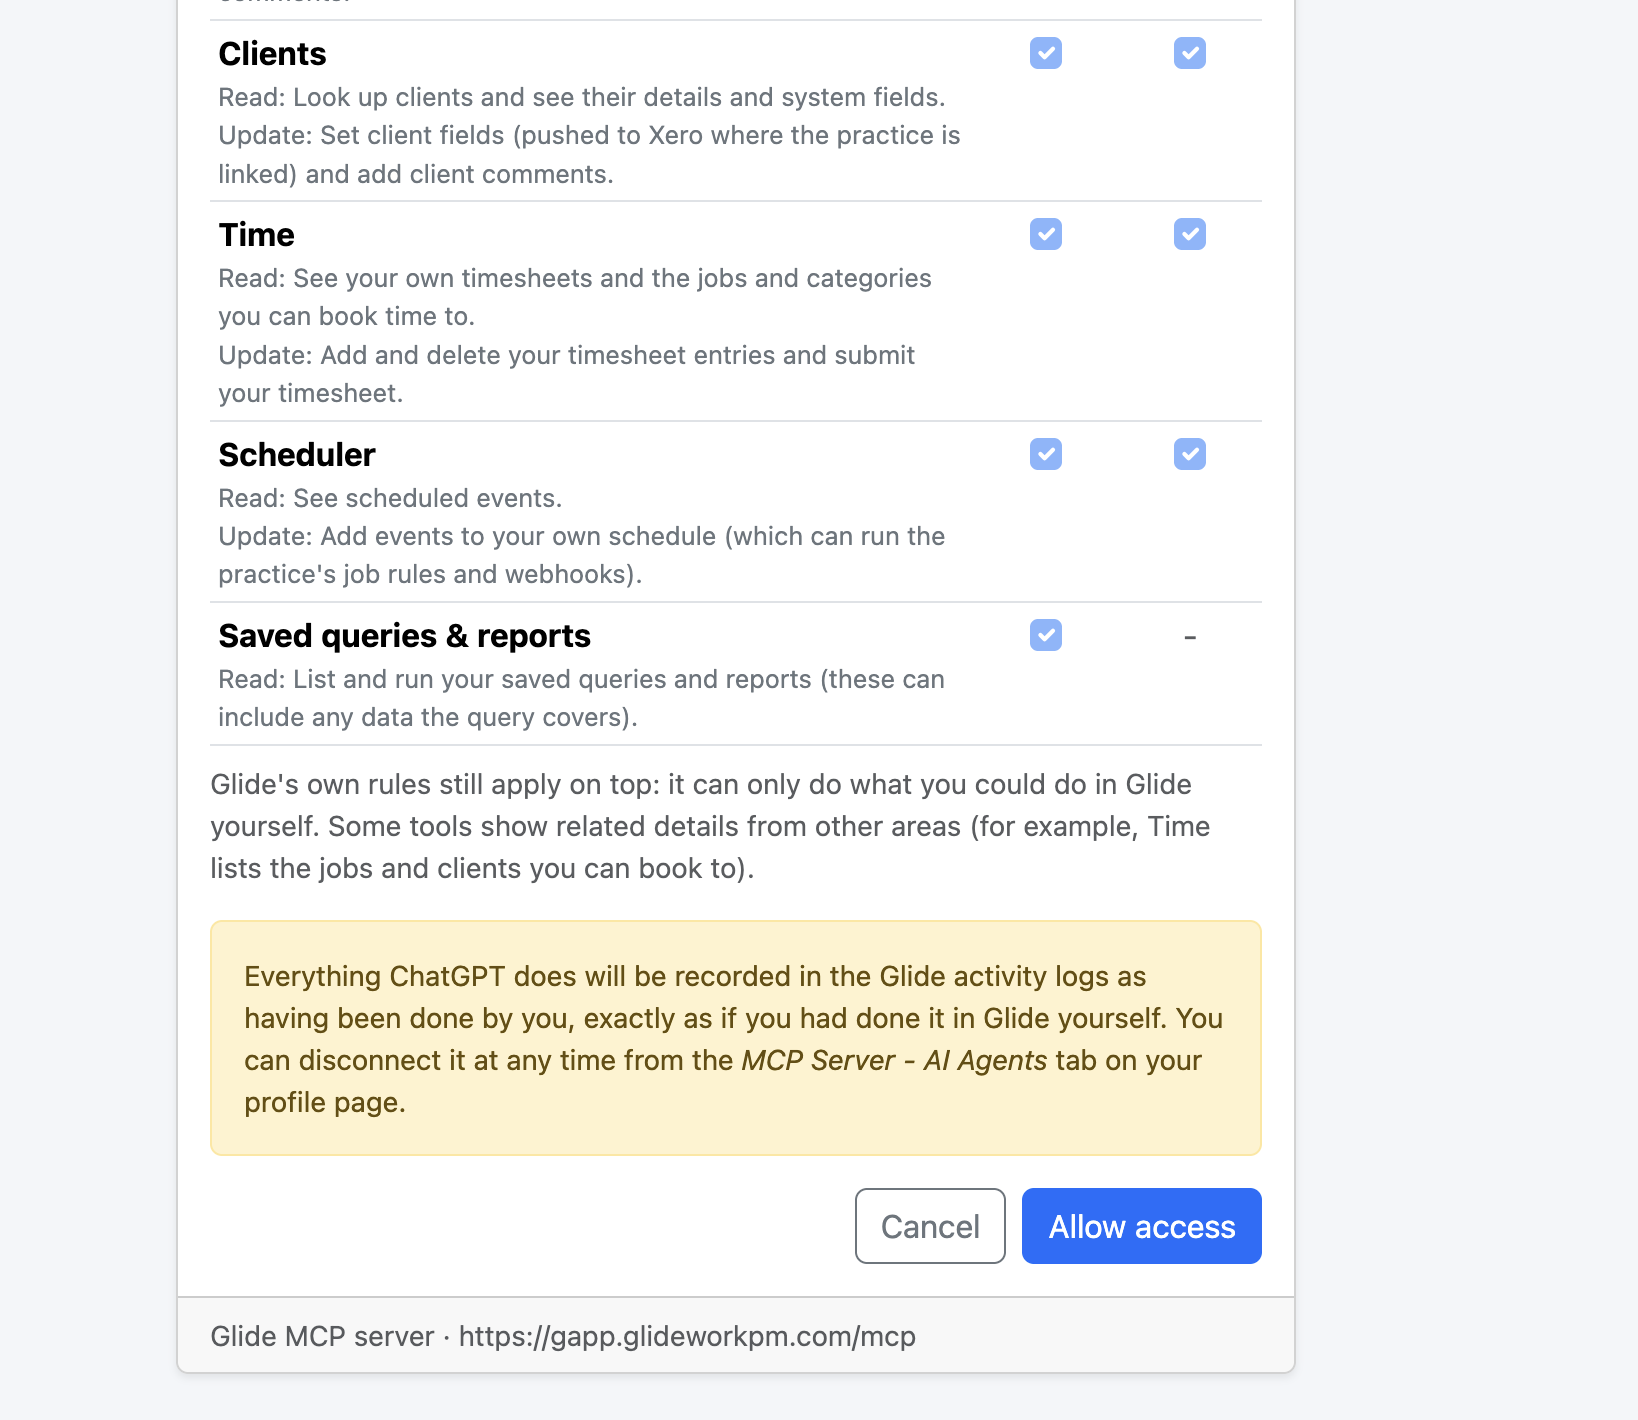
ChatGPT can only do what you are allowed to do in Glide. Everything it does is recorded in the Glide activity logs under your name, just as if you had done it yourself.
Using Glide in ChatGPT
You're all set. Start a new chat in ChatGPT and ask about your practice in plain English.
Ask a question
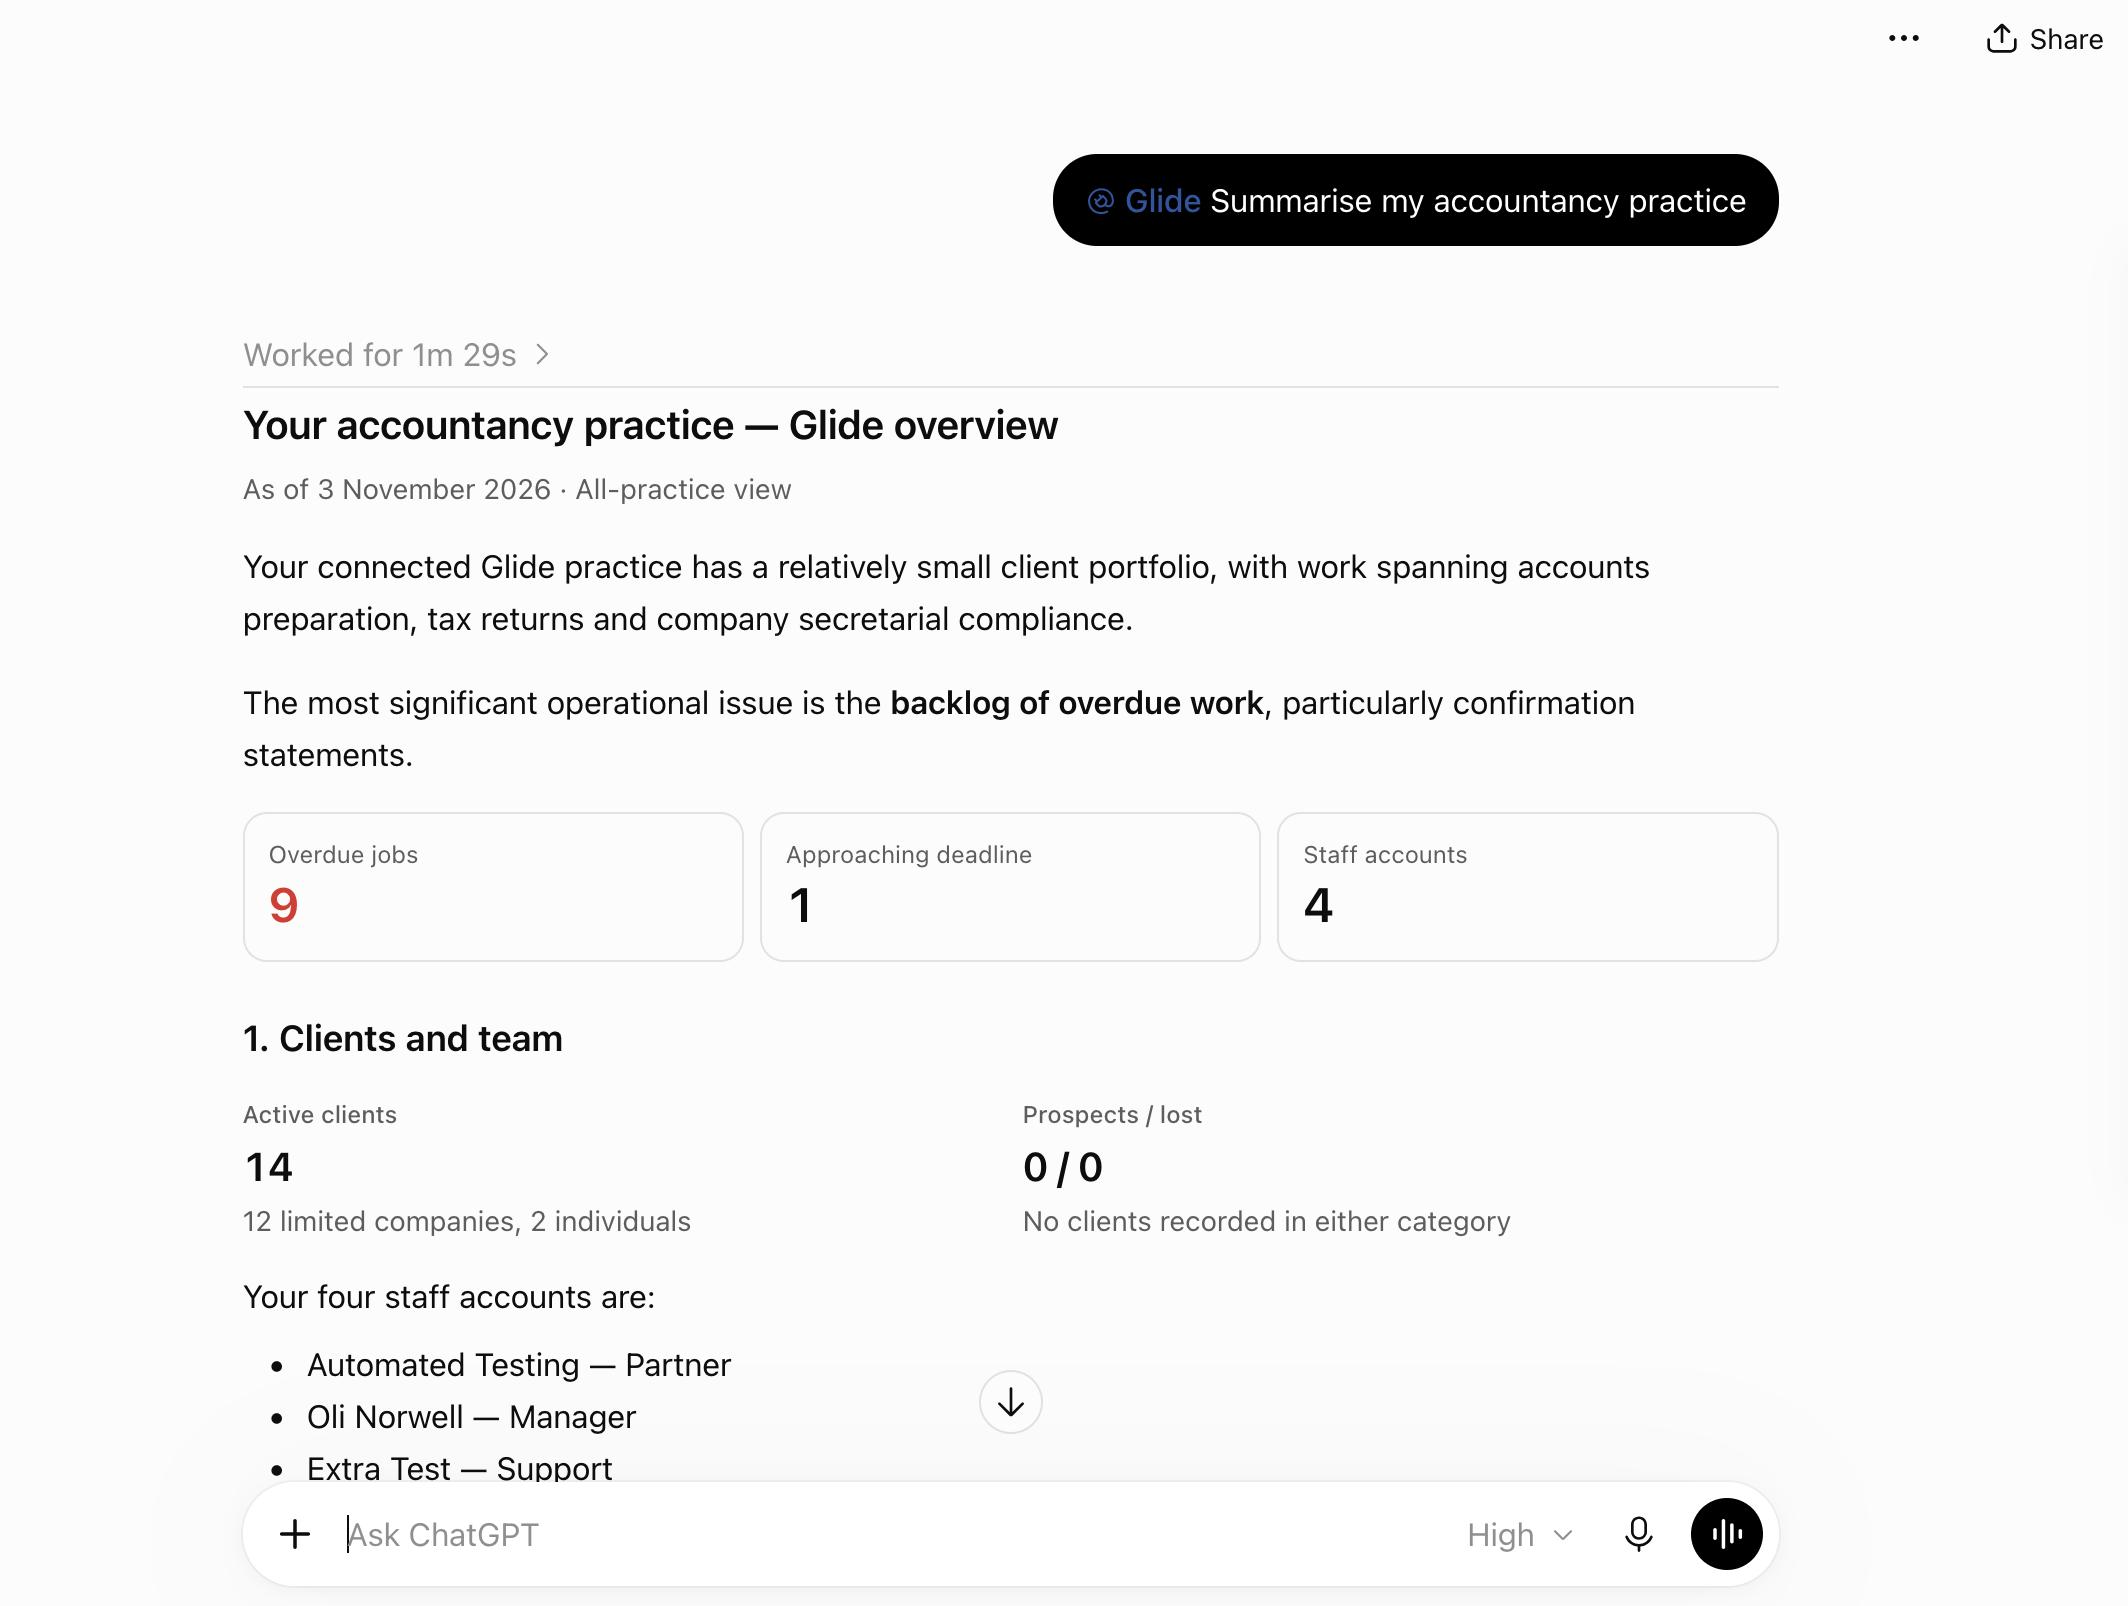
Type @Glide at the start of your message, then your question. For example:
@Glide Summarise my accountancy practice
ChatGPT looks up the answer in Glide. This can take a minute or two.
Ask follow-up questions
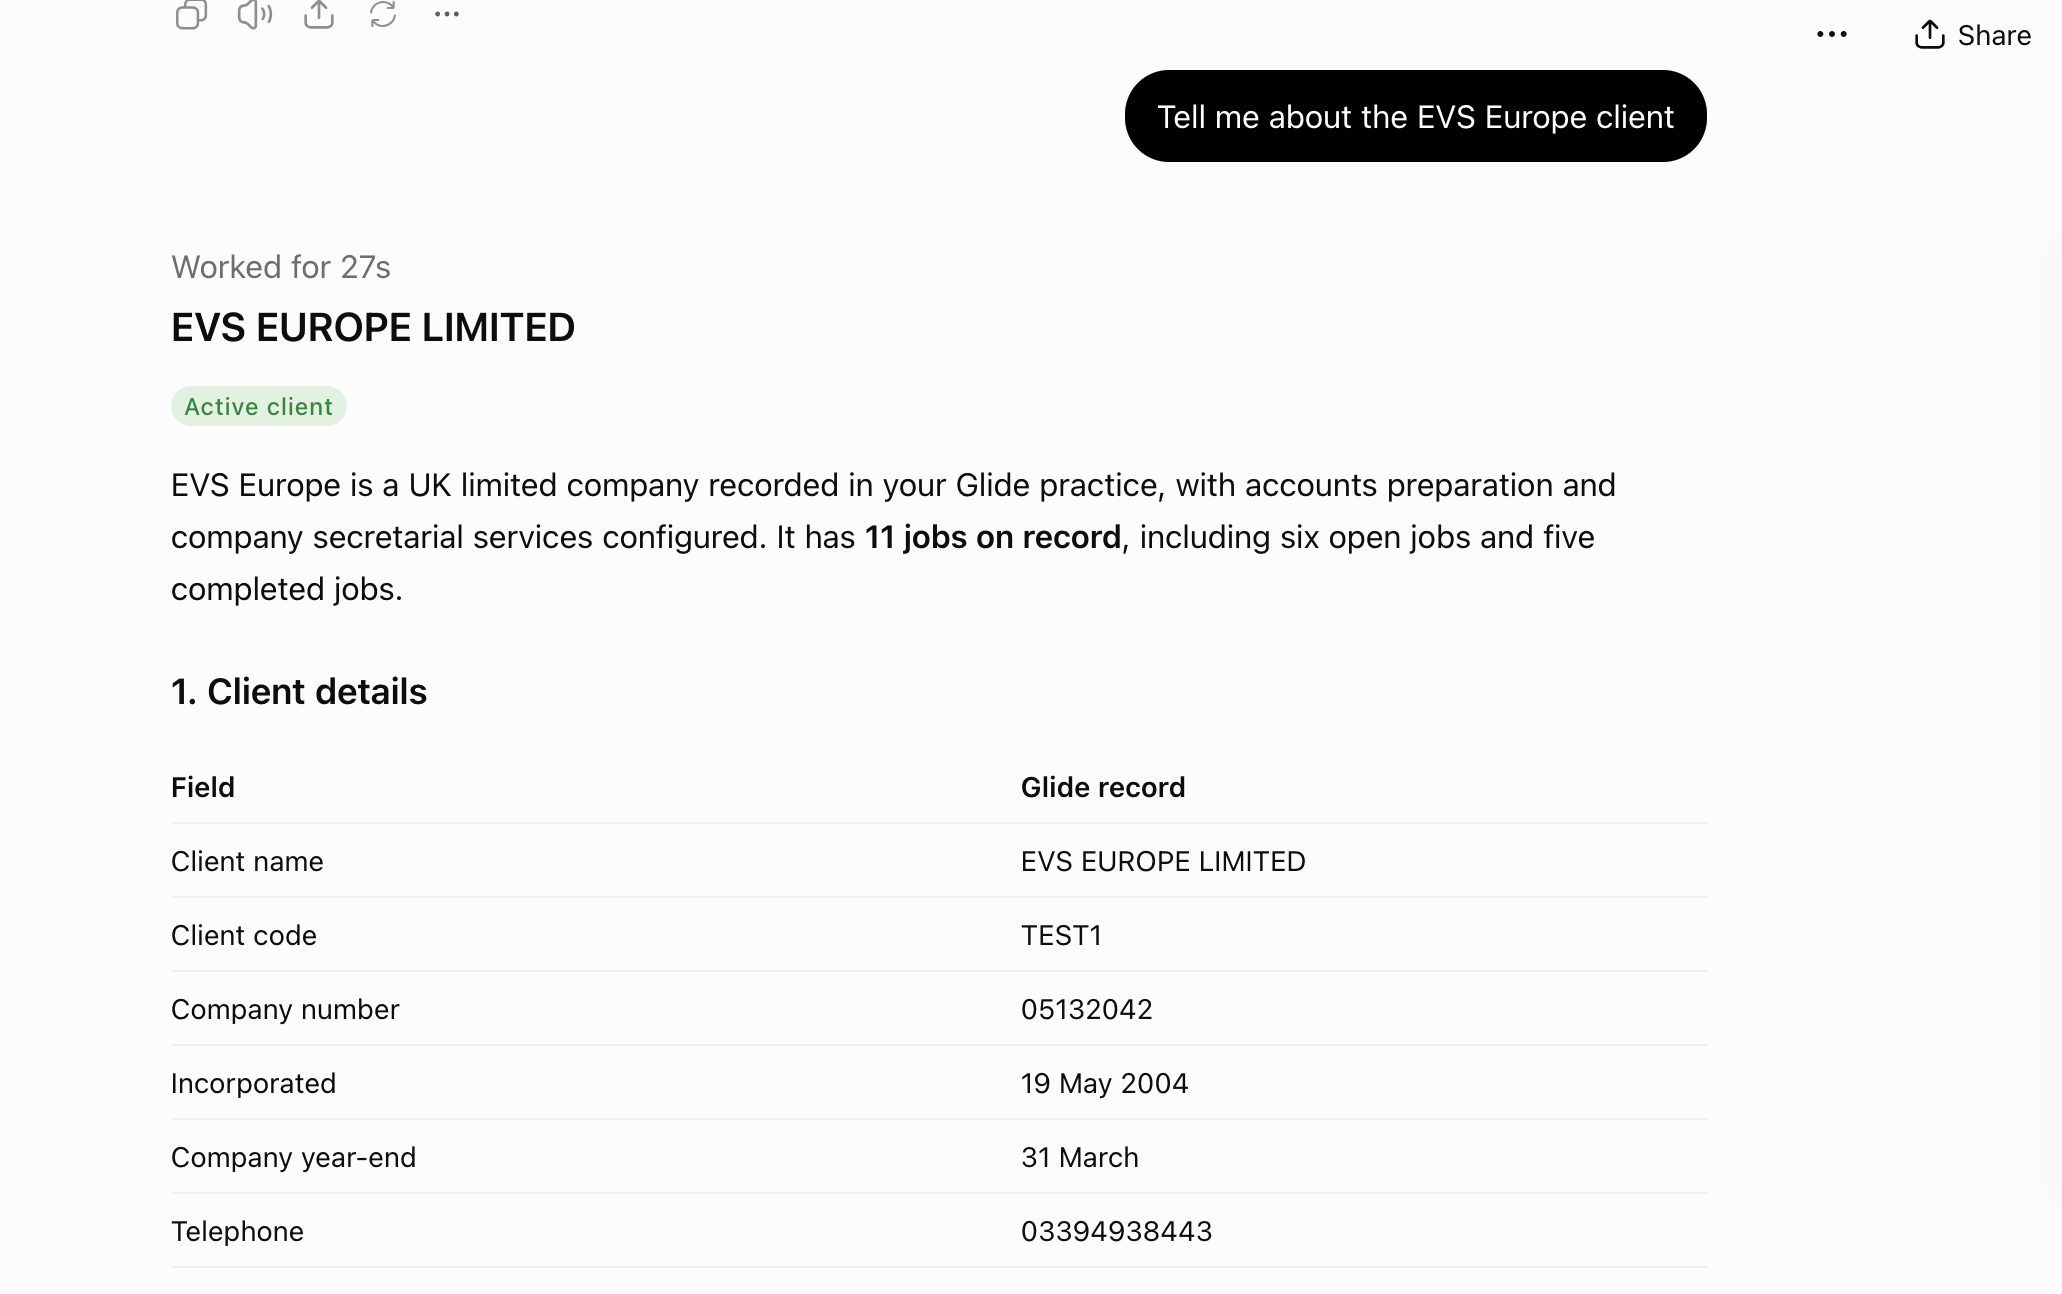
Keep chatting as normal. You can ask about a particular client:
Tell me about the EVS Europe client
Or ask about a particular job:
Where are we at with the confirmation statement for this client?
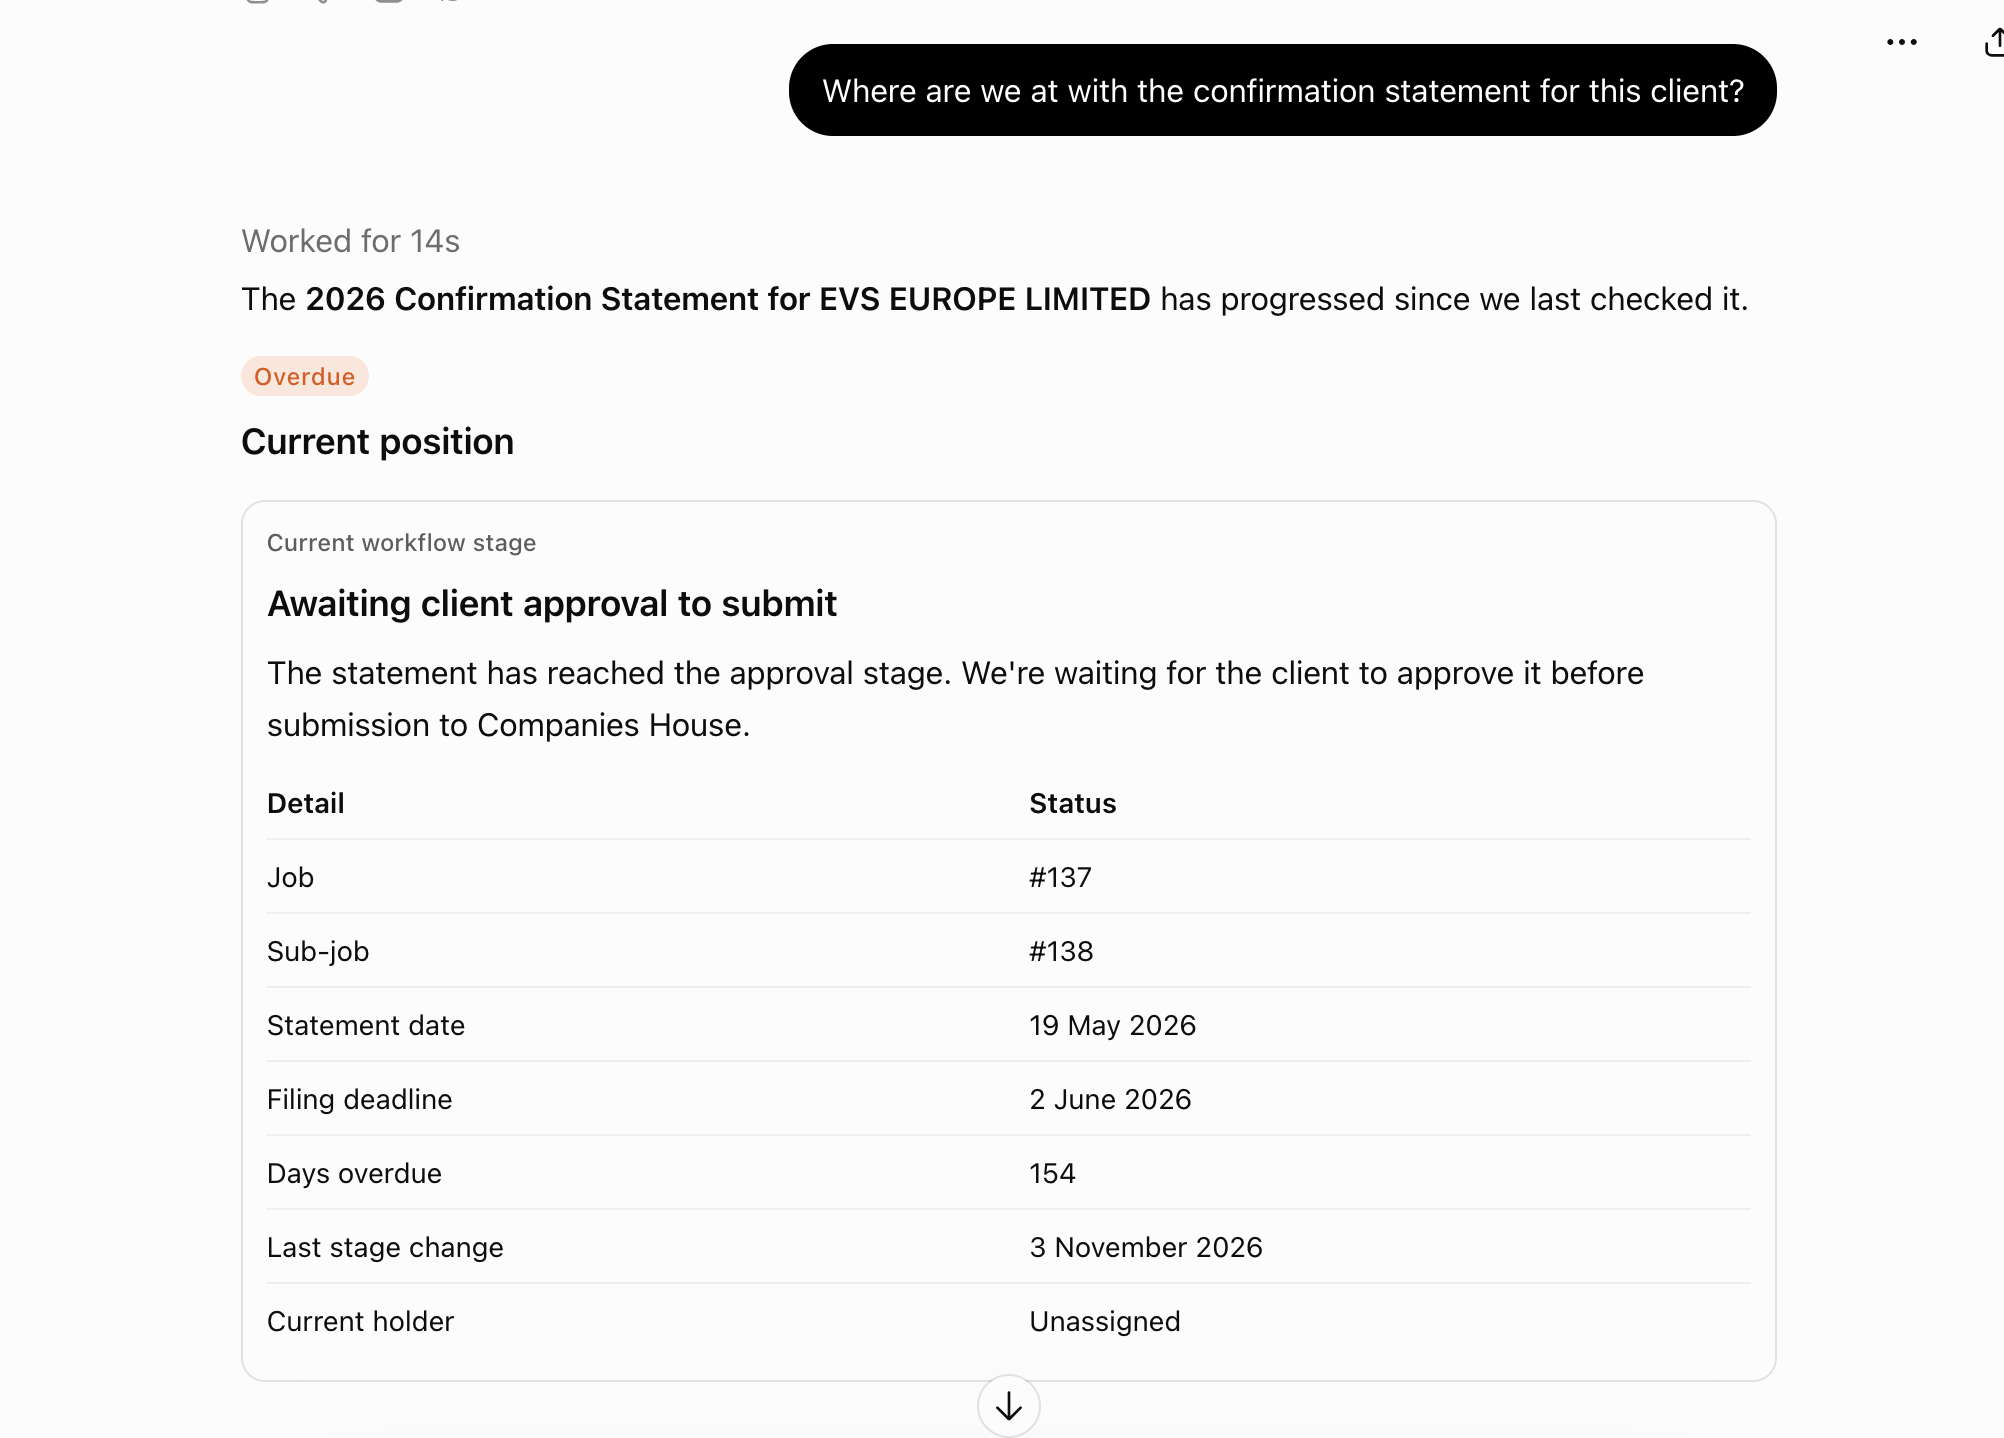
ChatGPT will often tell you what can happen next and suggest what to do.
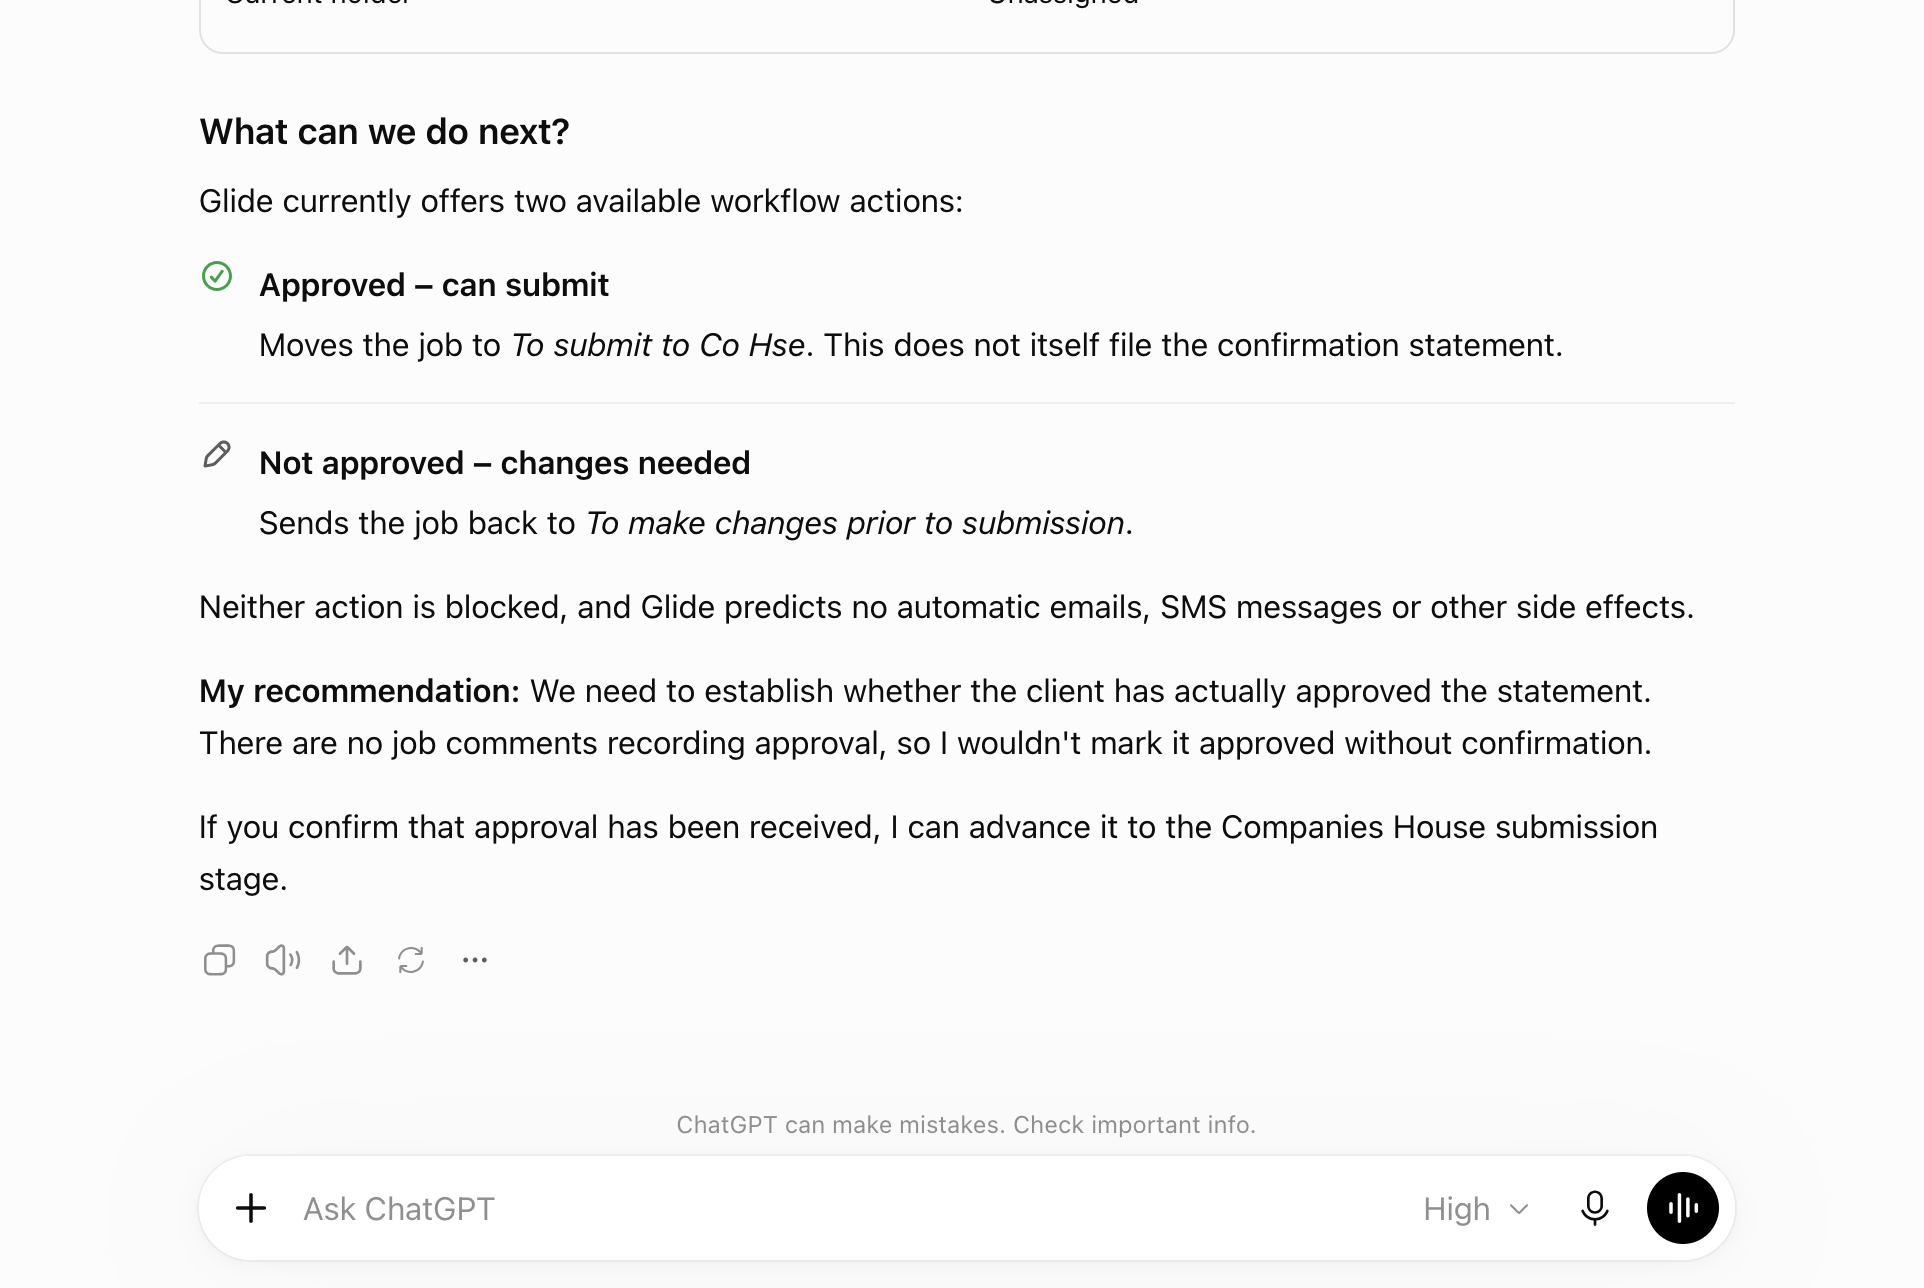
Ask ChatGPT to make a change
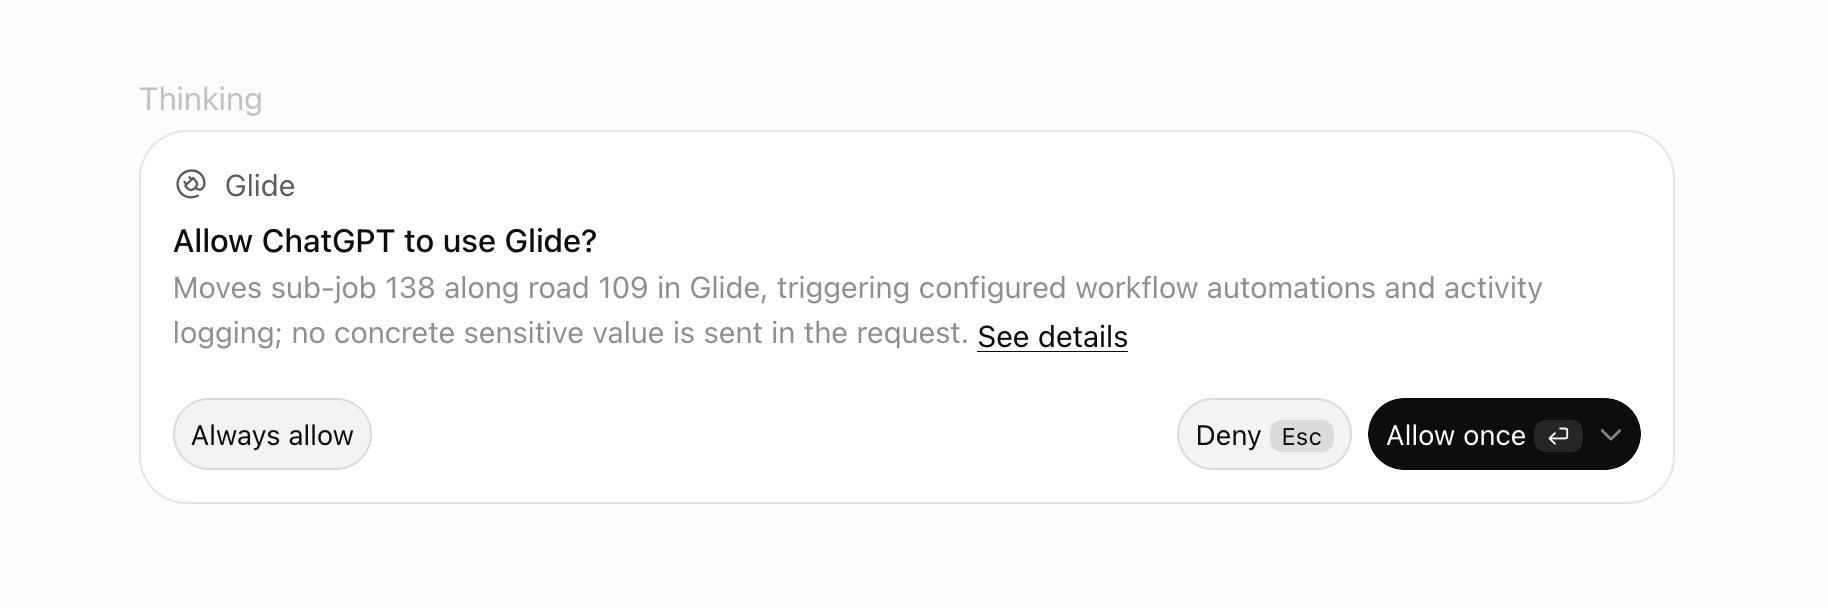
You can also ask ChatGPT to update Glide, for example to move a job to the next stage. Before it changes anything, ChatGPT will ask for your permission:
- Allow once: make this one change.
- Always allow: make this kind of change from now on without asking you first.
- Deny: don't make the change.
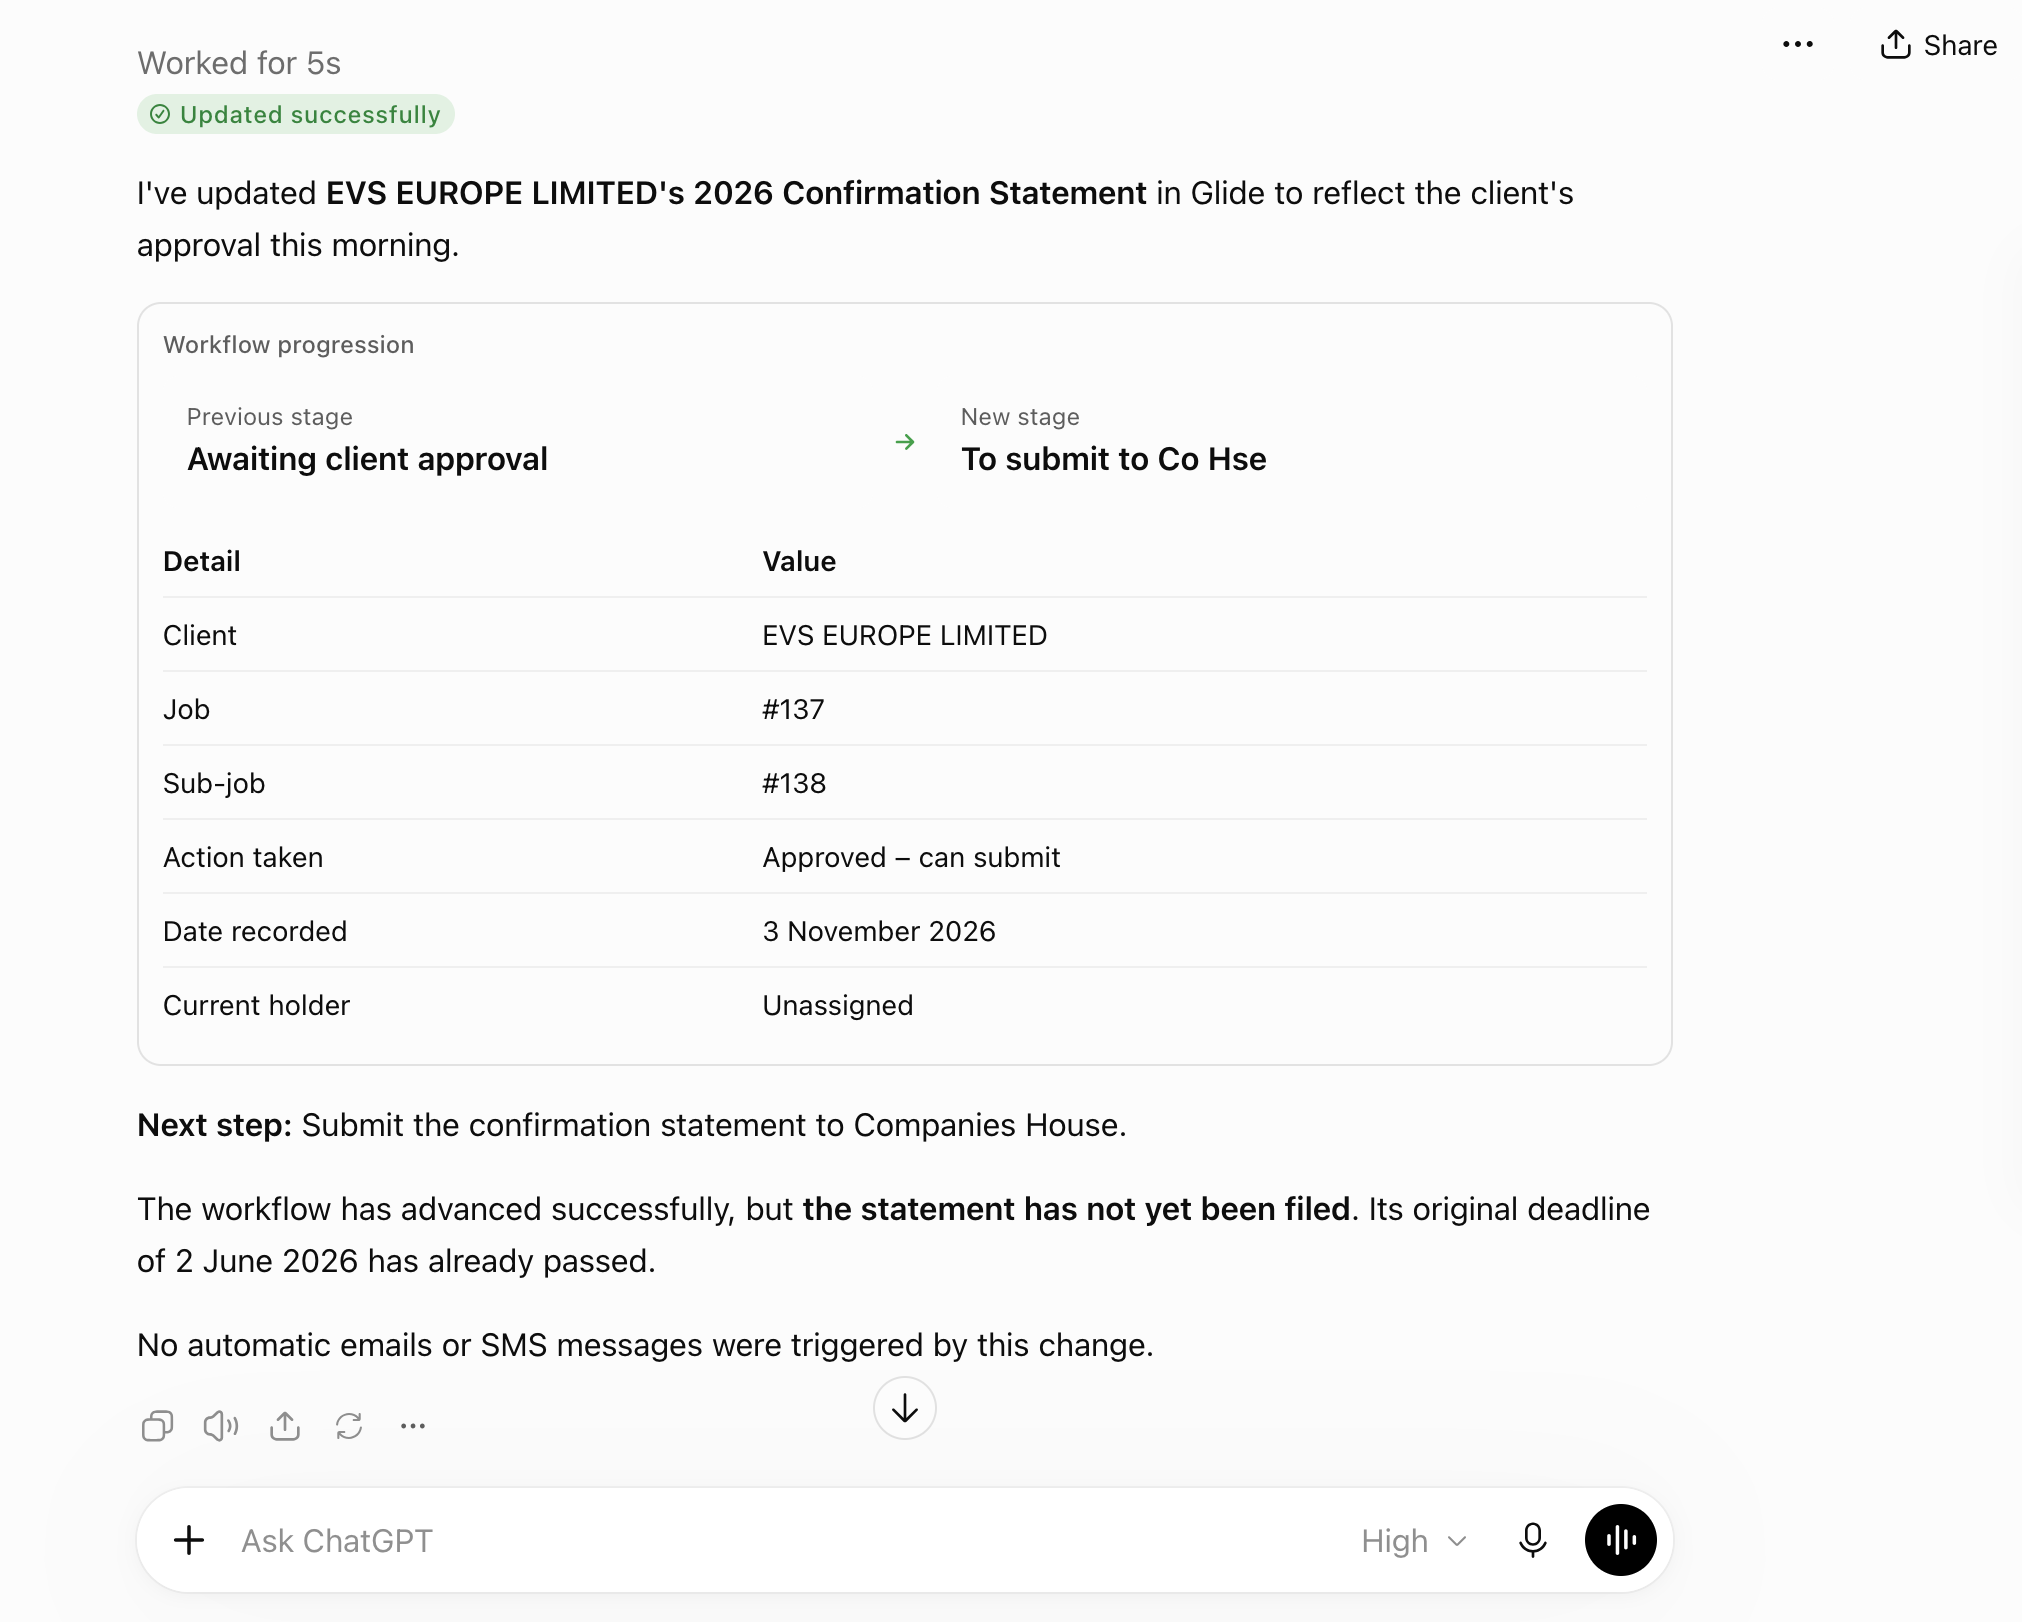
Once the change is made, ChatGPT confirms what it did.
If something goes wrong
“The Glide MCP server is switched off for this Glide system”
If you see this message after clicking Connect Glide, the MCP server hasn't been switched on for your practice yet.
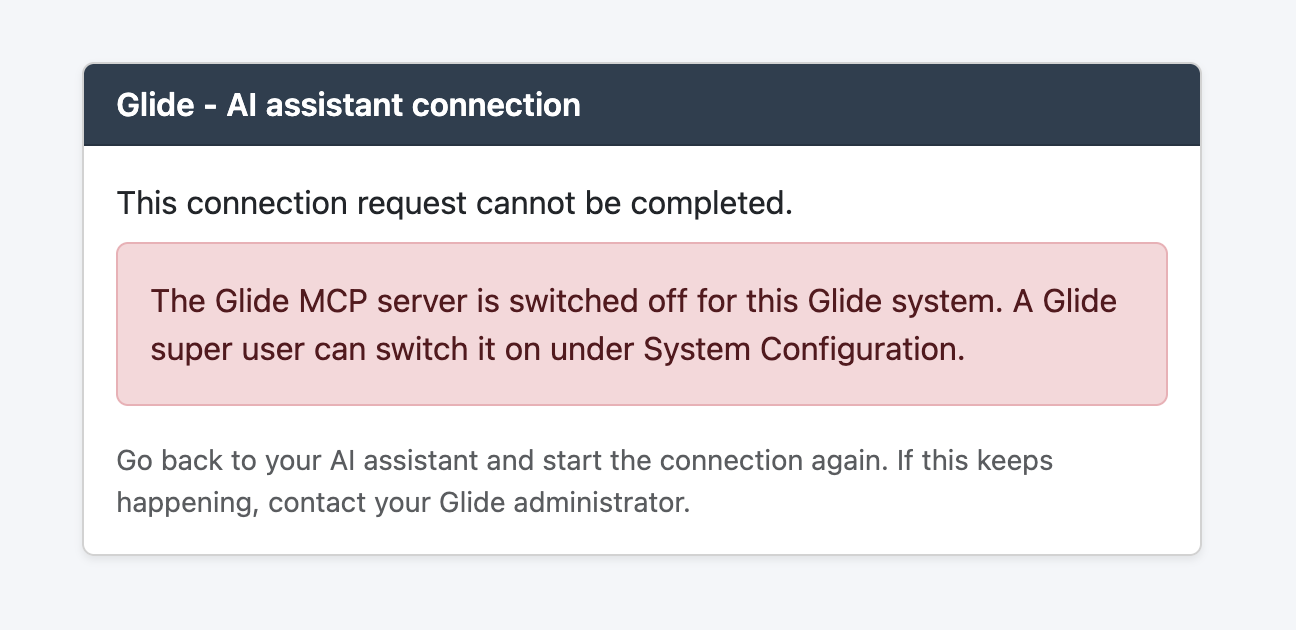
To fix it:
- Ask a Glide super user to switch it on (see Before you start).
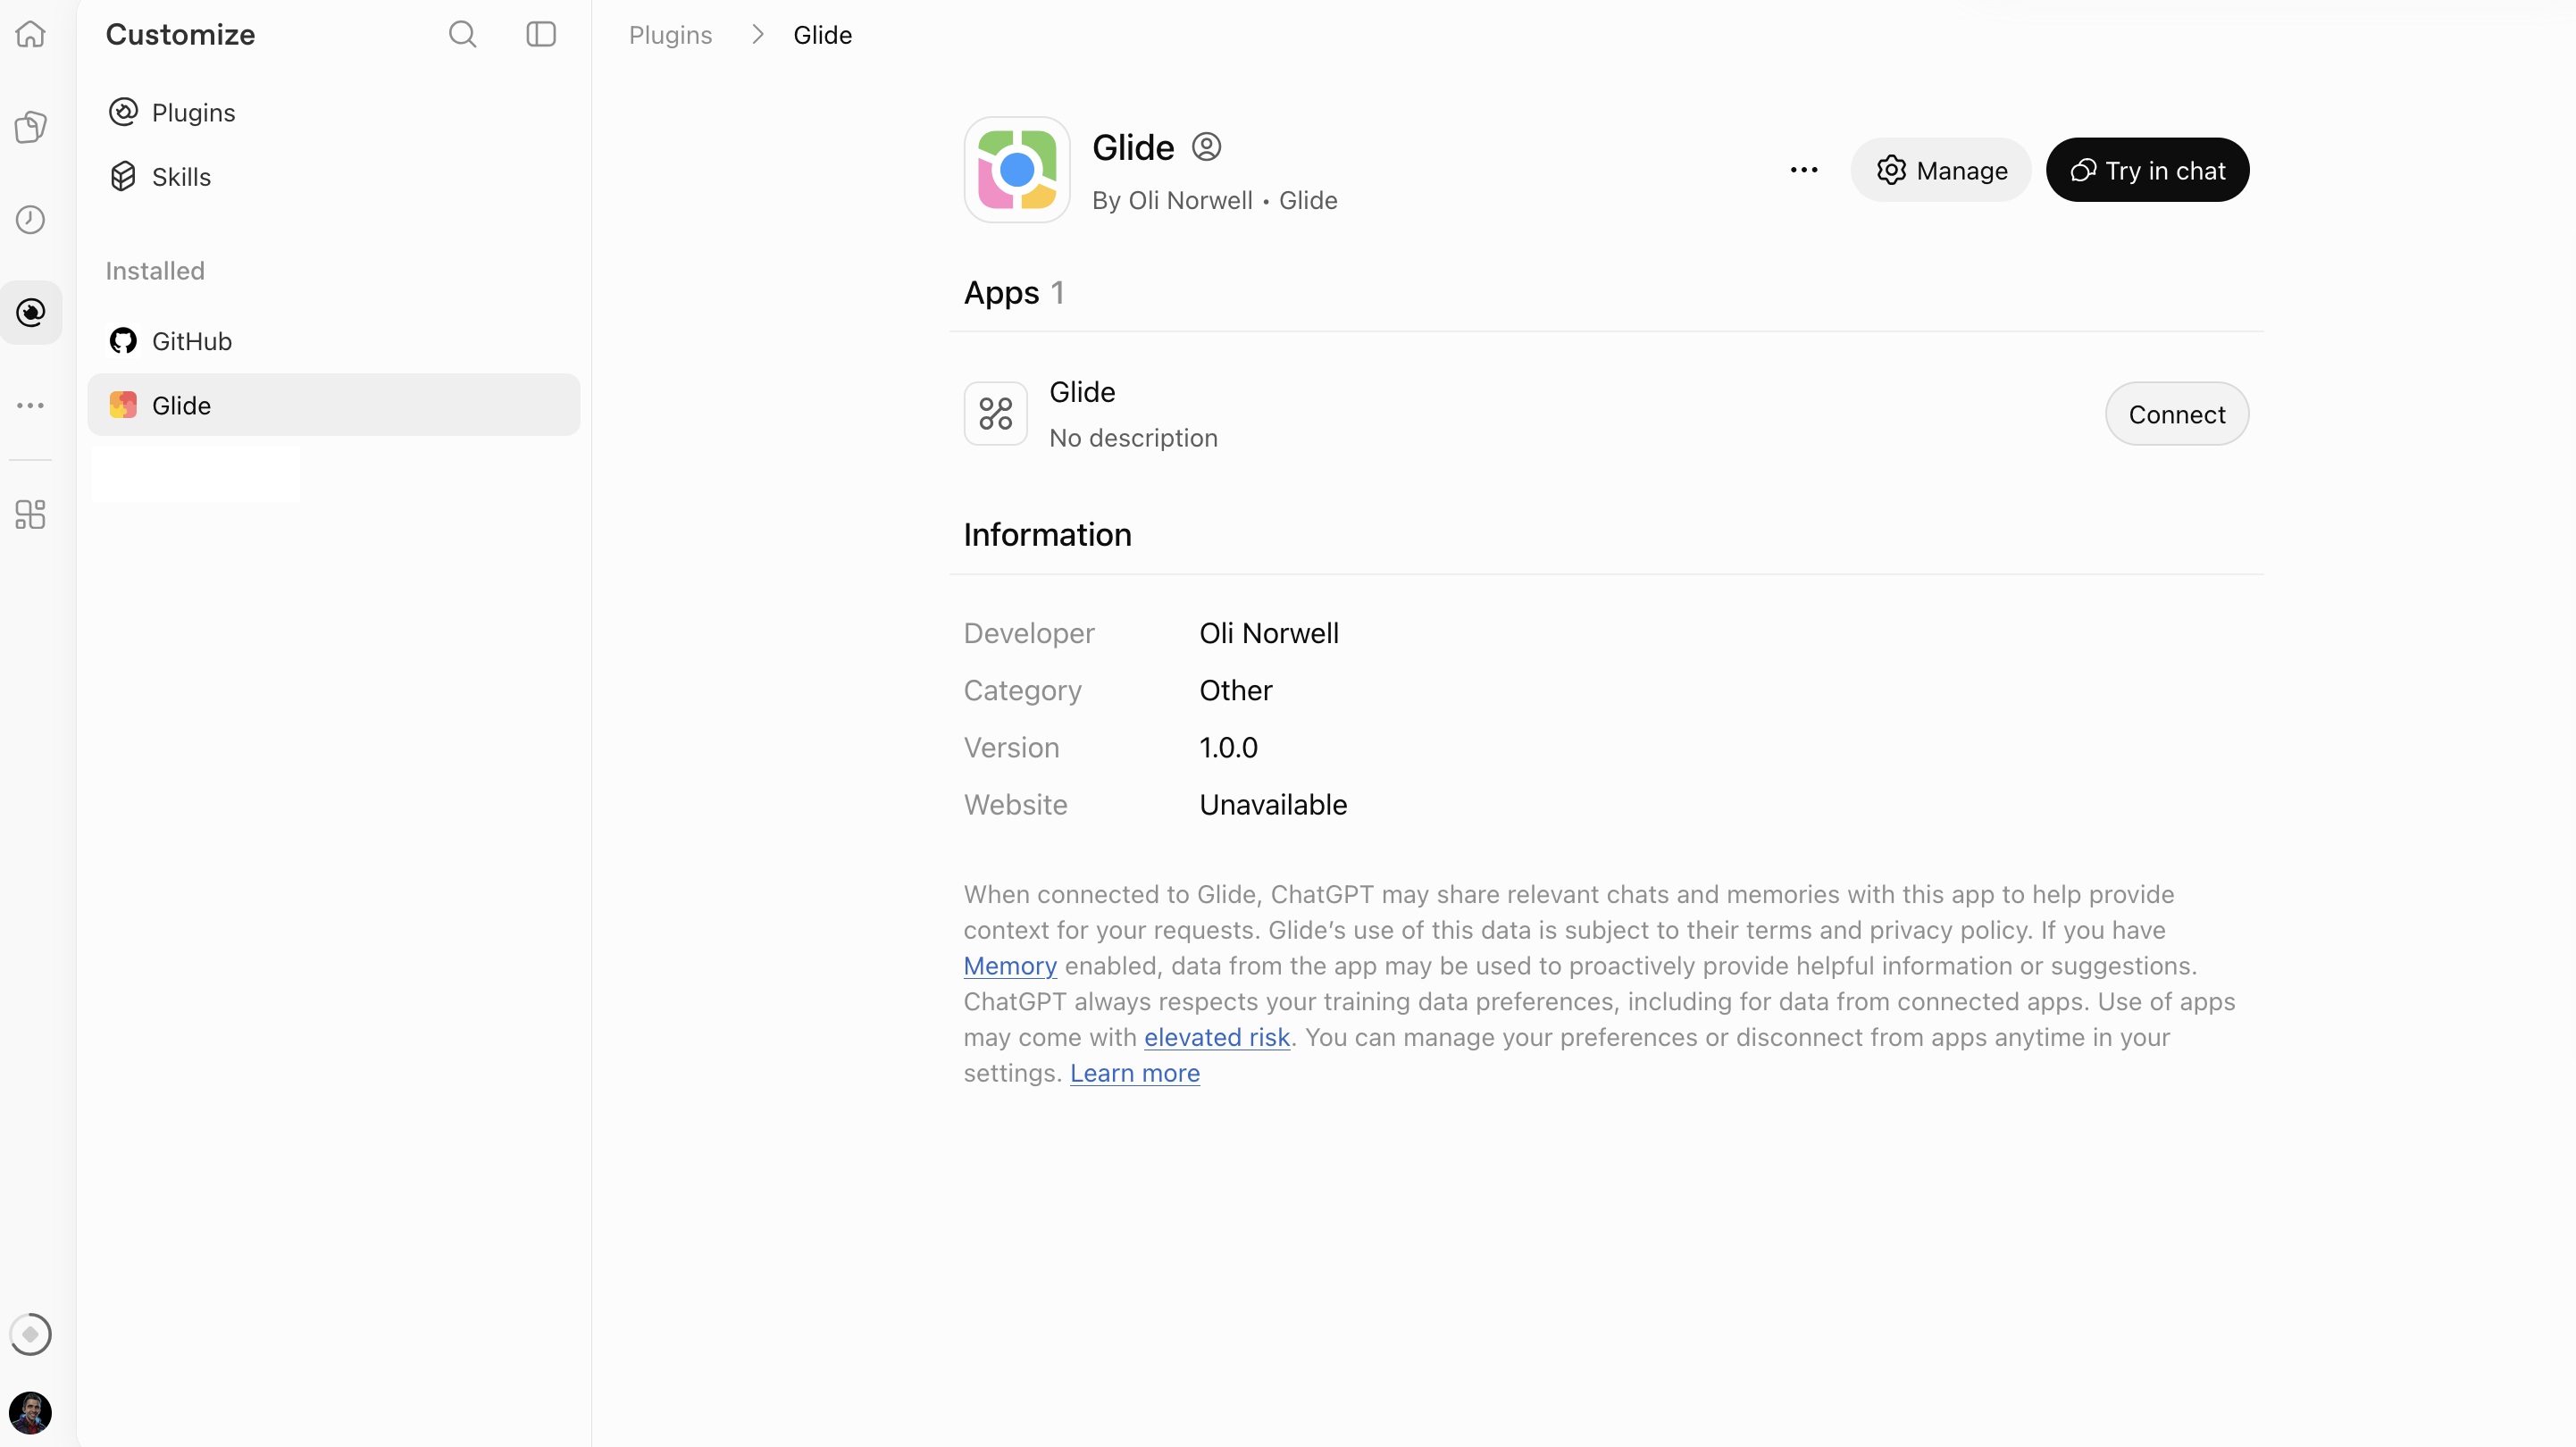
- In ChatGPT, go to Plugins > Plugins and click Glide under Installed.
- Click Connect and carry on from step 8.
Disconnecting ChatGPT from Glide
You can disconnect ChatGPT from Glide at any time. In Glide, open your profile page and go to the MCP Server – AI Agents tab.